General Troubleshooting Guide for LiteMage
Cache Size Growing Too Large
Uninitialized PHP variables in injected blocks
JavaScript global variable problem
Magento Connect “Exception during cache and session cleaning” Error
Magento front-end session timing out too soon
Error Message When Using Templates With AJAX Based Navigation
Error Message: "Your installation of LiteSpeed Web Server does not have LiteMage Cache enabled"
Header/Footer Disappear After Enabling LiteMage Cache
Turning On Maintenance Mode While LiteMage Is Enabled
Pop-ups Will Sometimes Not Appear
Form Keys Being Displayed On Web Page
Unable To Redirect 404 Pages To Search Results
3rd Party Store/Currency Auto Switcher Not Redirecting To Correct Page
Logged In Usernames (Or Cart Items) Being Shown On Other User's Pages
Need Additional Support?
Cache Size Growing Too Large
If you find that LiteMage's cache is becoming overly large, it is likely that you need to perform some “cleanup”. For direction on how to do this please refer to our entry on LiteMage Cache Cleanup.
Uninitialized PHP variables in injected blocks
Some customized themes may reference user initialized global PHP variables in injected blocks. When those ESI blocks render, null pointer errors will occur as those variables may have been initialized earlier but the injected block has no way of recognizing them.
For example, for SNS themes: the footer template may fail to output due to the variable “$var_snstheme” actually being initialized in the header block.
Solution: Find the code where this variable is initialized copy this logic to the template of the injected block. For example, adding the following 2 lines:
global $var_snstheme;
if (empty($var_snstheme)) {
    include (dirname(dirname(__FILE__)).'/sns/sns.php');
}
Similarly, for SM themes (such as sm-maxshop yttheme):
if (empty($var_yttheme)) {
        include (dirname(dirname(__FILE__)).'/sm/yt_prepar.php');
}
Alternatively you can remove footer block injection from LiteMage config.xml. This however will slow down page loading time as well as increase cache size and is hence not recommended.
JavaScript global variable problem
If a global variable in JavaScript is initialized based on user session data and saved in a public cache, then it will cause trouble for other users with differing session data.
As of version 1.0.2, a place holder block for JavaScript variables has been introduced. This place holder is a private block, so every user will get his/her own correct value.
Check the code:
code/community/Litespeed/Litemage/Block/Inject/Jsvar.php
You can also write your own code to customize this block. Please be sure to keep a copy of your customized code in a local directory to avoid it being overridden during LiteMage updates.
You generally do not need to modify the block code and can instead just modify the template associated with that block.
app/design/frontend/base/default/template/litemage/inject/jsvar.phtml
For example: “isLoggedIn” is used by an SNS ajax cart for wishlists. In LiteMage's config.xml file located under magento_install_directory/app/code/community/Litespeed/Litemage/etc, this block, “litemage.jsvar”, is listed under “welcome” and will be purged by logged_in/out events.
If you have any other variables based on events not already represented in LiteMage's config.xml file, you can add them in as new blocks in the “esiblock” section. (Be sure to add a LiteMage ESI observer for these events as well)
Magento Connect “Exception during cache and session cleaning” Error
When using the Magento Connect manager with certain browsers you may receive an “Exception during cache and session cleaning” error message in the Magento Connect output frame when attempting to either install or reinstall LiteMage. If this occurs, LiteMage will still be installed but your Magento site will become stuck in maintenance mode and therefore be inaccessible.
The reason for this is that when Magento Connect attempts to install any new modules to your store, it first creates a “maintenance.flag” file in the root directory. The presence of this file signals that your site is now in maintenance mode and changes can be safely made. Under normal circumstances this file should be automatically deleted once the installation has completed, but certain errors (such as this one) can cause Magento Connect to halt before reaching the removal step.
To fix this simply delete the “maintenance.flag” file from the root folder of your affected Magento site.
This issue is known to occur in the following browsers: Firefox
Magento front-end session timing out too soon
If your Magento site is timing out faster for users than your current “Cookie Lifetime” setting (default is 3600 seconds), PHP’s session.gc_maxlifetime parameter may be the problem.
Firstly, check your “Cookie Lifetime” setting to ensure it is set correctly by logging in to the Magento Admin Panel and navigating to System → Configuration and clicking “Web” under “GENERAL” in the left side menu. Look under “Session Cookie Management” for “Cookie Lifetime” and make sure that it is set as intended (in seconds).
Assuming that this was not the issue, open your sites php.ini file and look for “session.gc_maxlifetime”. If this is set to a smaller total number of seconds than your Magento “Cookie Lifetime” setting, PHP will clear the session data before Magento has the chance.
To fix this simply set “session.gc_maxlifetime” to a number greater than or equal to “Cookie Lifetime” and save your php.ini file.
Error Message When Using Templates With AJAX Based Navigation
If you are using a Magento theme that has AJAX based navigation, it is possible that you will encounter an error when trying to navigate to certain pages. This can be caused by your browser receiving the wrong cached response as a result of the way your template handles AJAX requests.
For example: Let's assume that your current URL is something like “your_site_url.html” and you are looking at page one. By visiting this page, the HTML response is now cached by LiteMage using it's URL. You then click on the second page which will be an AJAX call, the JSON response is also cached by LiteMage using it's URL.
Now say you want to click on your current page (page 2) again. You would assume that the cached JSON response for page 2 would be returned, but the URL used for requesting the current page is:
your_site_url.html#
Which your browser will interpret as “your_site_url.html”, thereby requesting the previously cached copy of page 1 instead. This happens because both requests are pointing to the same cached URL, so whatever is cached first will be returned.
You can fix this easily by modifying your theme's template with a single line change as we do below for the example sm_market theme (located under app/design/frontend/sm_market/default/template/page/html/pager.phtml):
Note: The sm_market theme appends additional information to the end of a URL to notify the back-end when it wants to make an AJAX request. For example, an AJAX request for page 2 of “test.html” would become “test.html?p=2&isLayerAjax=1” when using the sm_market theme. This appended information will vary from theme to theme.
Original
<?php foreach ($this->getFramePages() as $_page): ?>
         <?php if ($this->isPageCurrent($_page)): ?>
              <li class="current"><a href="#" onclick="javascript:void(0);"><?php echo $_page ?></a></li>
         <?php else: ?>
              <li class=""><a href="<?php echo $this->getPageUrl($_page) ?>"><?php echo $_page ?></a></li>
         <?php endif;?>
<?php endforeach;?>
Modified
<?php foreach ($this->getFramePages() as $_page): ?>
    <?php if ($this->isPageCurrent($_page)): ?>
        <li class="current"><a href="<?php echo $this->getPageUrl($_page) ?>"><?php echo $_page ?></a></li>
    <?php else: ?>
        <li class=""><a href="<?php echo $this->getPageUrl($_page) ?>"><?php echo $_page ?></a></li>
    <?php endif;?>
<?php endforeach;?>
Which will now ensure that the full page URL is used for each page request. This guarantees that each HTML and AJAX request will have their own unique URL and therefore, their own unique cached copies.
Error Message: "Your installation of LiteSpeed Web Server does not have LiteMage Cache enabled"
If you encounter the following error message at the top of the “LiteMage Configuration” section of your Magento Admin Panel

It means that you do not have LiteMage correctly enabled in your “.htaccess” file. To do this follow the Turn On The LiteMage Module instructions on our LiteMage installation page.
Header/Footer Disappear After Enabling LiteMage Cache
You may find that after enabling LiteMage Cache, your sites header, footer, and other dynamically loaded blocks (or the LiteMage specific options under System > Cache Management in the Magento Admin Panel) disappear.
This is caused by mistakenly attempting to disable LiteMage by disabling “Litespeed_Litemage” under System > Configuration > ADVANCED > Advanced > Disable Modules Output, instead of setting “Enable LiteMage Cache” to “No” under System > Configuration > LITEMAGE CACHE > LiteMage Configuration. By doing the former, you are disabling the LiteMage Modules output but not LiteMage itself. LiteMage is still enabled and punching holes on your page, but with it's output disabled, it is unable to output the ESI response to your sites frontend, resulting in those blocks appearing “missing”.
To fix this simply navigate to System > Configuration > ADVANCED > Advanced > Disable Modules Output, set “Litespeed_Litemage” to “Enable”, and click “Save Config” at the top right of the page.
Turning On Maintenance Mode While LiteMage Is Enabled
If your Magento sites root directory, where index.php is located, contains a file named “maintenance.flag”, your Magento site is currently in maintenance mode and would display a 503 error page. In the browser you will get a message saying “Service Temporarily Unavailable” with the detailed explanation “The server is temporarily unable to service your request due to maintenance downtime or capacity problems. Please try again later.”
However, if a page is currently cached, LSWS will serve the cached copy instead, as it won't reach the backend to know that the site is in maintenance mode. This is often undesirable as the cached versions of these pages may become invalidated during maintenance and anything involving the backend will not work.
This leaves us with two possible scenarios:
1. You need to purge LiteMage Cache after maintenance
After maintenance, go to the Magento Admin Panel and navigate to System > Cache Management > Flush All LiteMage Cache
2. You do not need to purge LiteMage Cache after maintenance
During maintenance, add the following rewrite rule to the beginning of your “.htaccess” file to have all requests for /index.php redirected to /errors/503.php instead:
RewriteCond %{REQUEST_URI} !^/(media|skin|js)/
RewriteCond %{REQUEST_FILENAME} !-f
RewriteCond %{REQUEST_FILENAME} !-d
RewriteCond %{REQUEST_FILENAME} !-l
RewriteRule .* errors/503.php [L, E=Cache-Control:no-cache]
Once maintenance has been completed, either remove or comment out this rewrite rule to restore your site back to it’s normal state.
Pop-ups Will Sometimes Not Appear
When using LiteMage in conjunction with a JS/CSS Compressor (such as the PotatoCommerce Compressor), you may notice that some pop-ups, such as the list of items contained in a customer’s shopping cart, may not appear when being moused over for example.
The reason this is happening is because JS/CSS Compressors create and store a separate compressed file. As the cart (in this example) is a private block, LiteMage punches a hole there. Now when the page is loaded, the cart content is served from LiteMage ESI response, which the compressor does not know about, meaning the javascript will not be processed by the compressor correctly. Because of this, when you mouse over the cart, javascript will not be properly triggered and nothing will be displayed.
But What about the times that the pop-up does appear? It is possible that javascript somewhere else on your web page is being triggered and properly resetting the pop-up.
If you would like to continue to use LiteMage without any issues, you must either disable such compressors or move/remove the javascript from the template (phtml) of the hole-punched block; for example, the minicart template in
design/frontend/.../template/checkout/cart/minicart.phtml,
Form Keys Being Displayed On Web Page
When using LiteMage with certain other extensions, a problem can be introduced where these other extensions attempt to parse the web page containing LiteMage's ESI tags and being unfamiliar with the ESI syntax, stripping them. For example, <esi:include> and <esi:inline> tags would become <include> and <inline>. This will cause the ESI content to not be parsed and processed by LiteSpeed Web Server, causing form keys to be displayed on the page, the footer to disappear, as well as possible other issues.
Example of Form Key being displayed near “ADD TO CART” button:
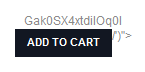
To correct this, Navigate to System » Configuration and click on LiteMage Configuration under LITEMAGE CACHE. In General Settings, set “Use Alternative ESI Syntax” to “Yes”. Enabling this setting will change the ESI Syntax used by LiteMage to something only it and LiteSpeed Web Server are aware of. With a new syntax being used, other extensions should no longer alter LiteMage's ESI tags and your web pages should once again display properly.
Unable To Redirect 404 Pages To Search Results
In Magento's default implementation, all 404 pages are treated as being identical with the full action name of the default “No-route Controller” being cms_index_noRoute. LiteMage's default configuration will cache the output for this controller.
If you have any extensions that change this default behavior, such as Mirasvit's Sphinx Search Ultimate which can redirect 404 pages to specific search results, you will have to change LiteMage's default configuration to not cache these pages.
In LiteMage's “config.xml” file under <default> » <litemage> » <default>, change the following from
<fullcache_routes><![CDATA[cms_index_noRoute]]></fullcache_routes>
to
<fullcache_routes></fullcache_routes>
Note: This change is not available through Magento's Admin Panel and must be set through LiteMage's configuration file. As such, you will have to manually apply this change to LiteMage's “config.xml” file every time you upgrade LiteMage to a new version.
3rd Party Store/Currency Auto Switcher Not Redirecting To Correct Page
If you have a multi-store/currency setup that uses an auto switcher, such as Extendware's Store / Currency Switcher which gracefully redirects customers to the proper store and currency based on their geo location and browser configuration, you may need to perform some additional configuration to have this function as expected.
In order to determine which store and currency a customer should be redirected to, the customers first request must hit the backend so that the proper cookie can be set. Without this cookie, the default store will be served from cache instead. To fix this behavior, you need to force the customers first request to hit the Magento backend.
Add the following rewrite rules to your “.htaccess” file:
RewriteCond %{HTTP_COOKIE} !frontend
RewriteCond %{HTTP_USER_AGENT} !(litemage_walker|googlebot|bingbot|googlebot|yahoo) [NC]
RewriteRule .* - [E=Cache-Control:vary=hitback,E=Cache-Control:no-cache]
These rules will check if the “frontend” cookie is not set, which will always be the case on a customers first visit, and if the user agent is not a bot. If these conditions are met, we then force the request to hit the backend using a fake cookie vary.
Lastly, in order for LiteMage's crawler to properly crawl your multiple currencies/stores, you must also add “/litemage_walker/” to your auto switcher's disabled user agents list.
For example: In Extendware's Store / Currency Switcher, you can disable auto-switching for any user agents matching an input regular expression. Simply navigate to Disabled User Agents » User Agent RegExp and add “/litemage_walker/”.
Logged In Usernames/Cart Items Being Shown On Other User's Pages
Seen In: Ultimo Theme, Meigee Harbour Theme
This issue is caused when the block containing the username is not being punched properly. This causes private information to be publicly cached and displayed on public pages.
To confirm that this is the problem, you can enable debug mode and append ?LITEMAGE_DEBUG=SHOWHOLES to the end of your site url. This will show all holes being punched on the page, where you can check if the block containing the username or cart items is being punched properly.
The simplest solution to this problem is to go to the Magento Admin Panel and navigate to System→Configuration→LiteMage Configuration and add “header” to Customized Block Names for “toplinks” Tag. This will punch a hole for the entire header block.
The more complicated solution involves looking carefully at your template file for customized code, such as
<?php if($toplinks['displayas'] == 1){echo '<span class="simple">';}
if (Mage::getSingleton('customer/session')->isLoggedIn()==1):
echo '<span class="customer-name"><strong>' . $customer->getCustomer()->getName() . '</strong></
span>';
endif;
Since LiteMage can only punch a hole on a block defined through a layout file, the dynamically generated content here will not be recognized. You can however create a new block containing this logic and define that block in the layout file with a unique name. Once you have done this you can then add this new block name to the Customized Block Names for “toplinks” Tag list.
Need Additional Support?
If you need any additional support or help installing, configuring, or troubleshooting LiteMage for your Magento store, have a look at our LiteMage Support page.