This is an old revision of the document!
LiteSpeed Cache for WordPress: Crawler
The crawler travels through your site, refreshing pages that have expired in the cache. This makes it less likely that your visitors will encounter uncached pages.
Before you Begin
The crawler must be enabled at the server level, or it will not work. Please contact your hosting provider, or see our instructions.
Before using any of the functions in this area, please be sure that you have configured the crawler to your liking.
Getting Ready to Run
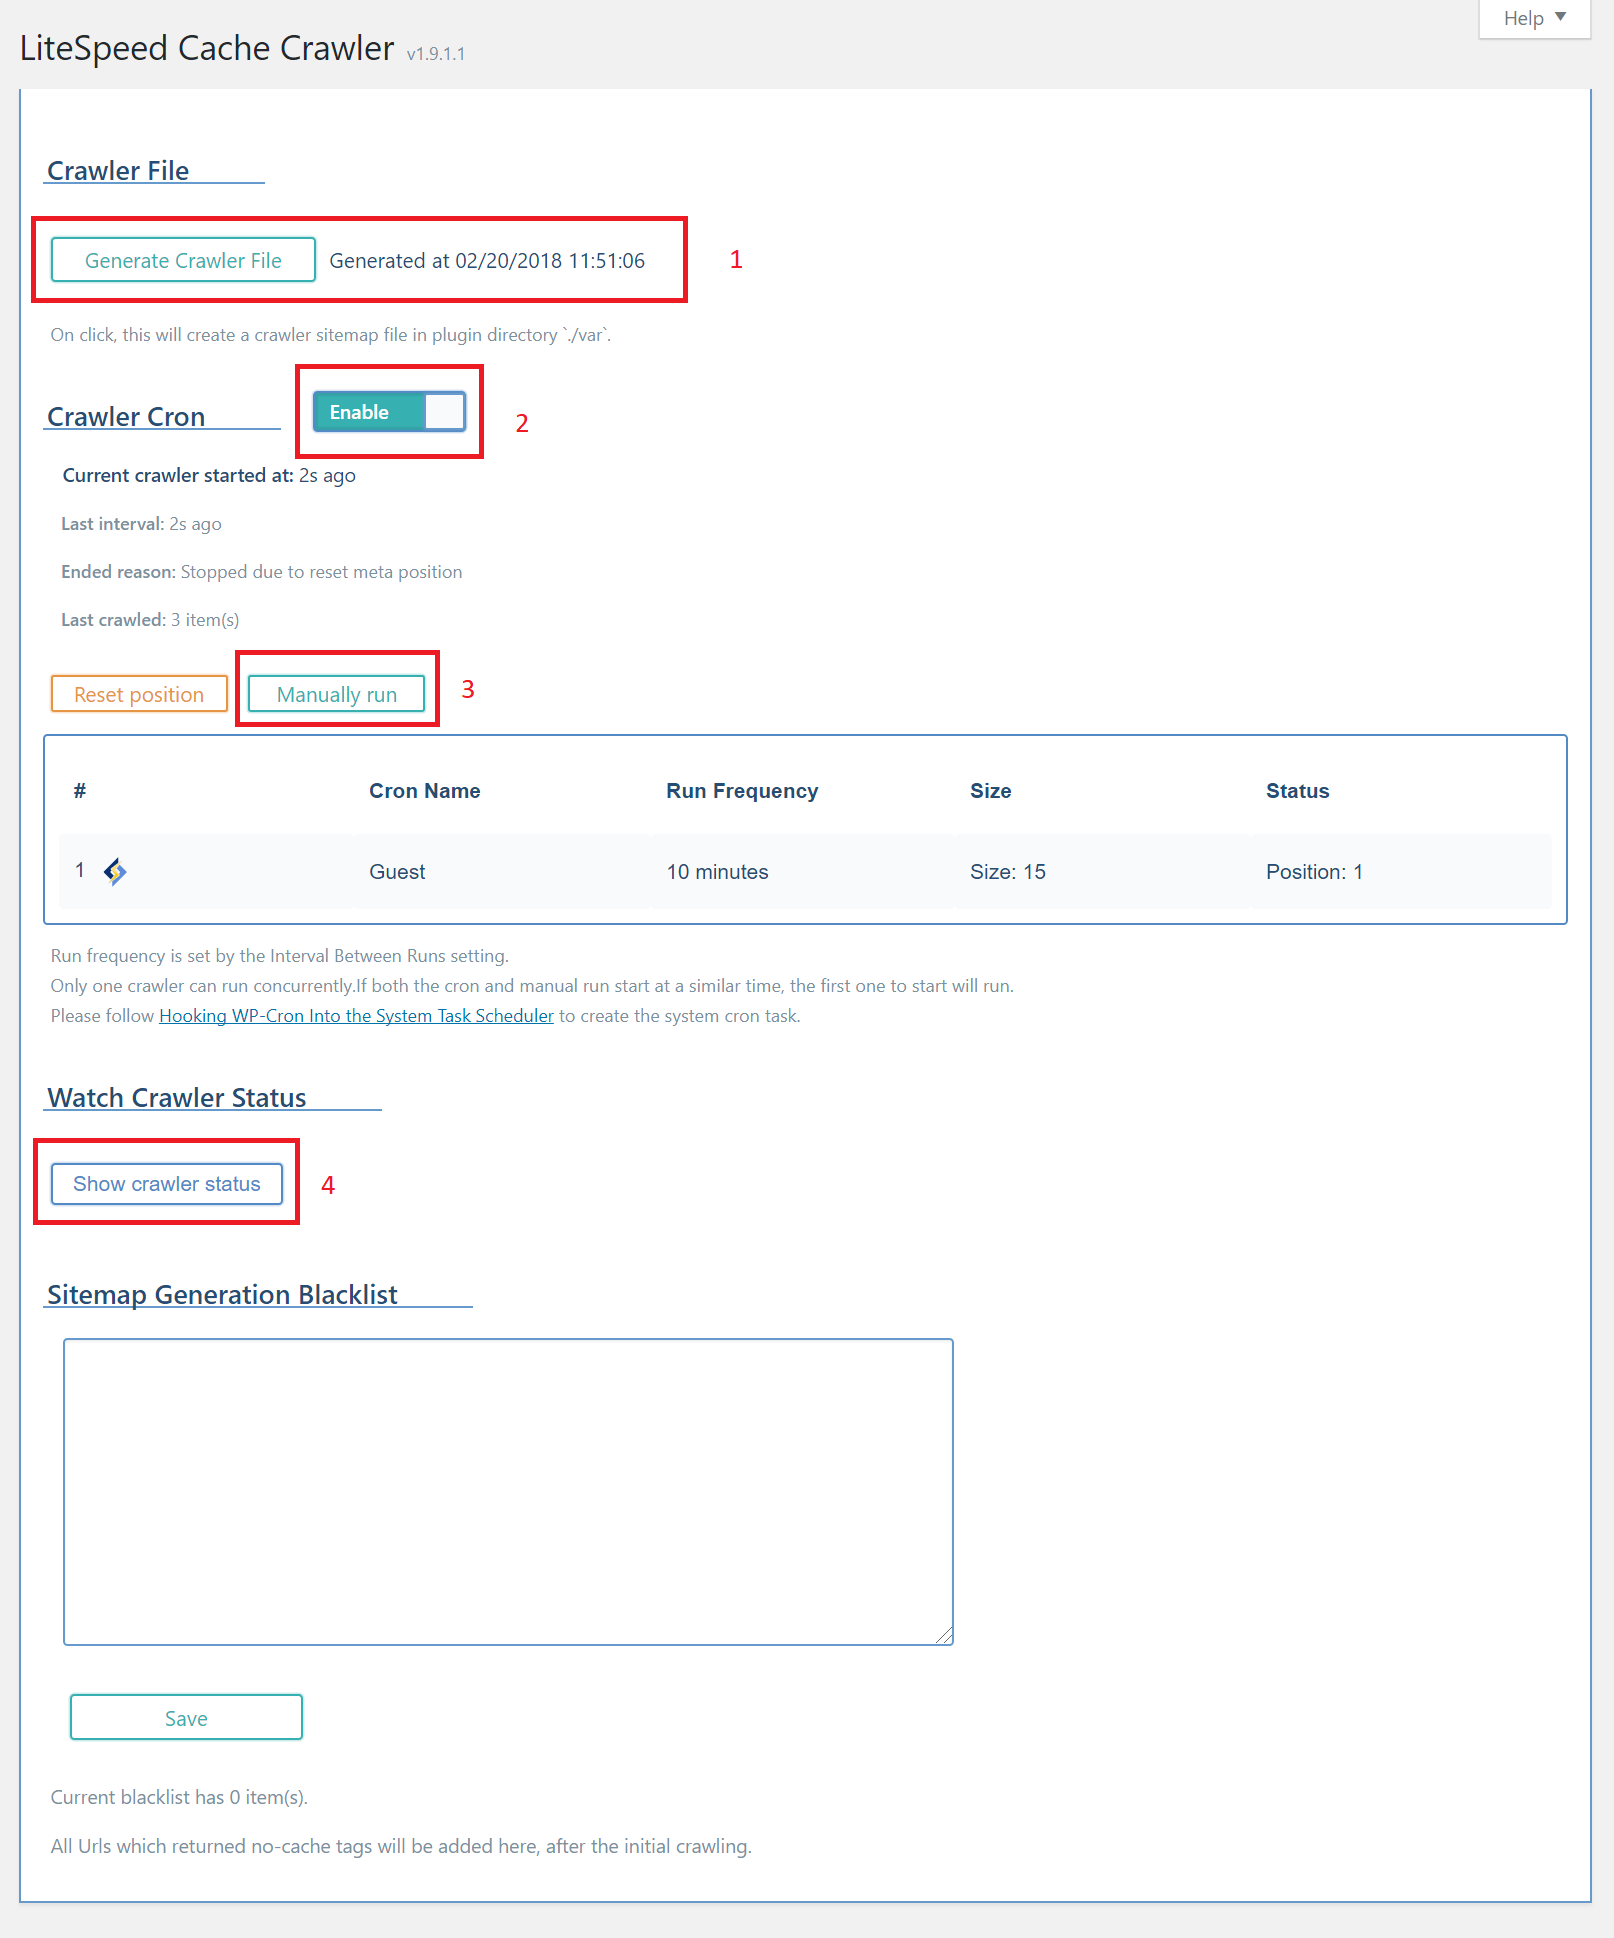
- If you don't already have a sitemap file, you can generate one here by pressing the Generate Crawler File button. (If you already have an XML sitemap, you can enter the URL on the Crawler settings tab.)
- Set Activate to
Enableto turn on the crawler. - If you want to watch the crawler's progress, press the Show Crawler Status button.
- You can wait for the crawler to begin on its own according to its configuration settings, or you can press the Manually Run button and start it immediately. If the crawler is already running, this button will be ignored.
Running the Crawler
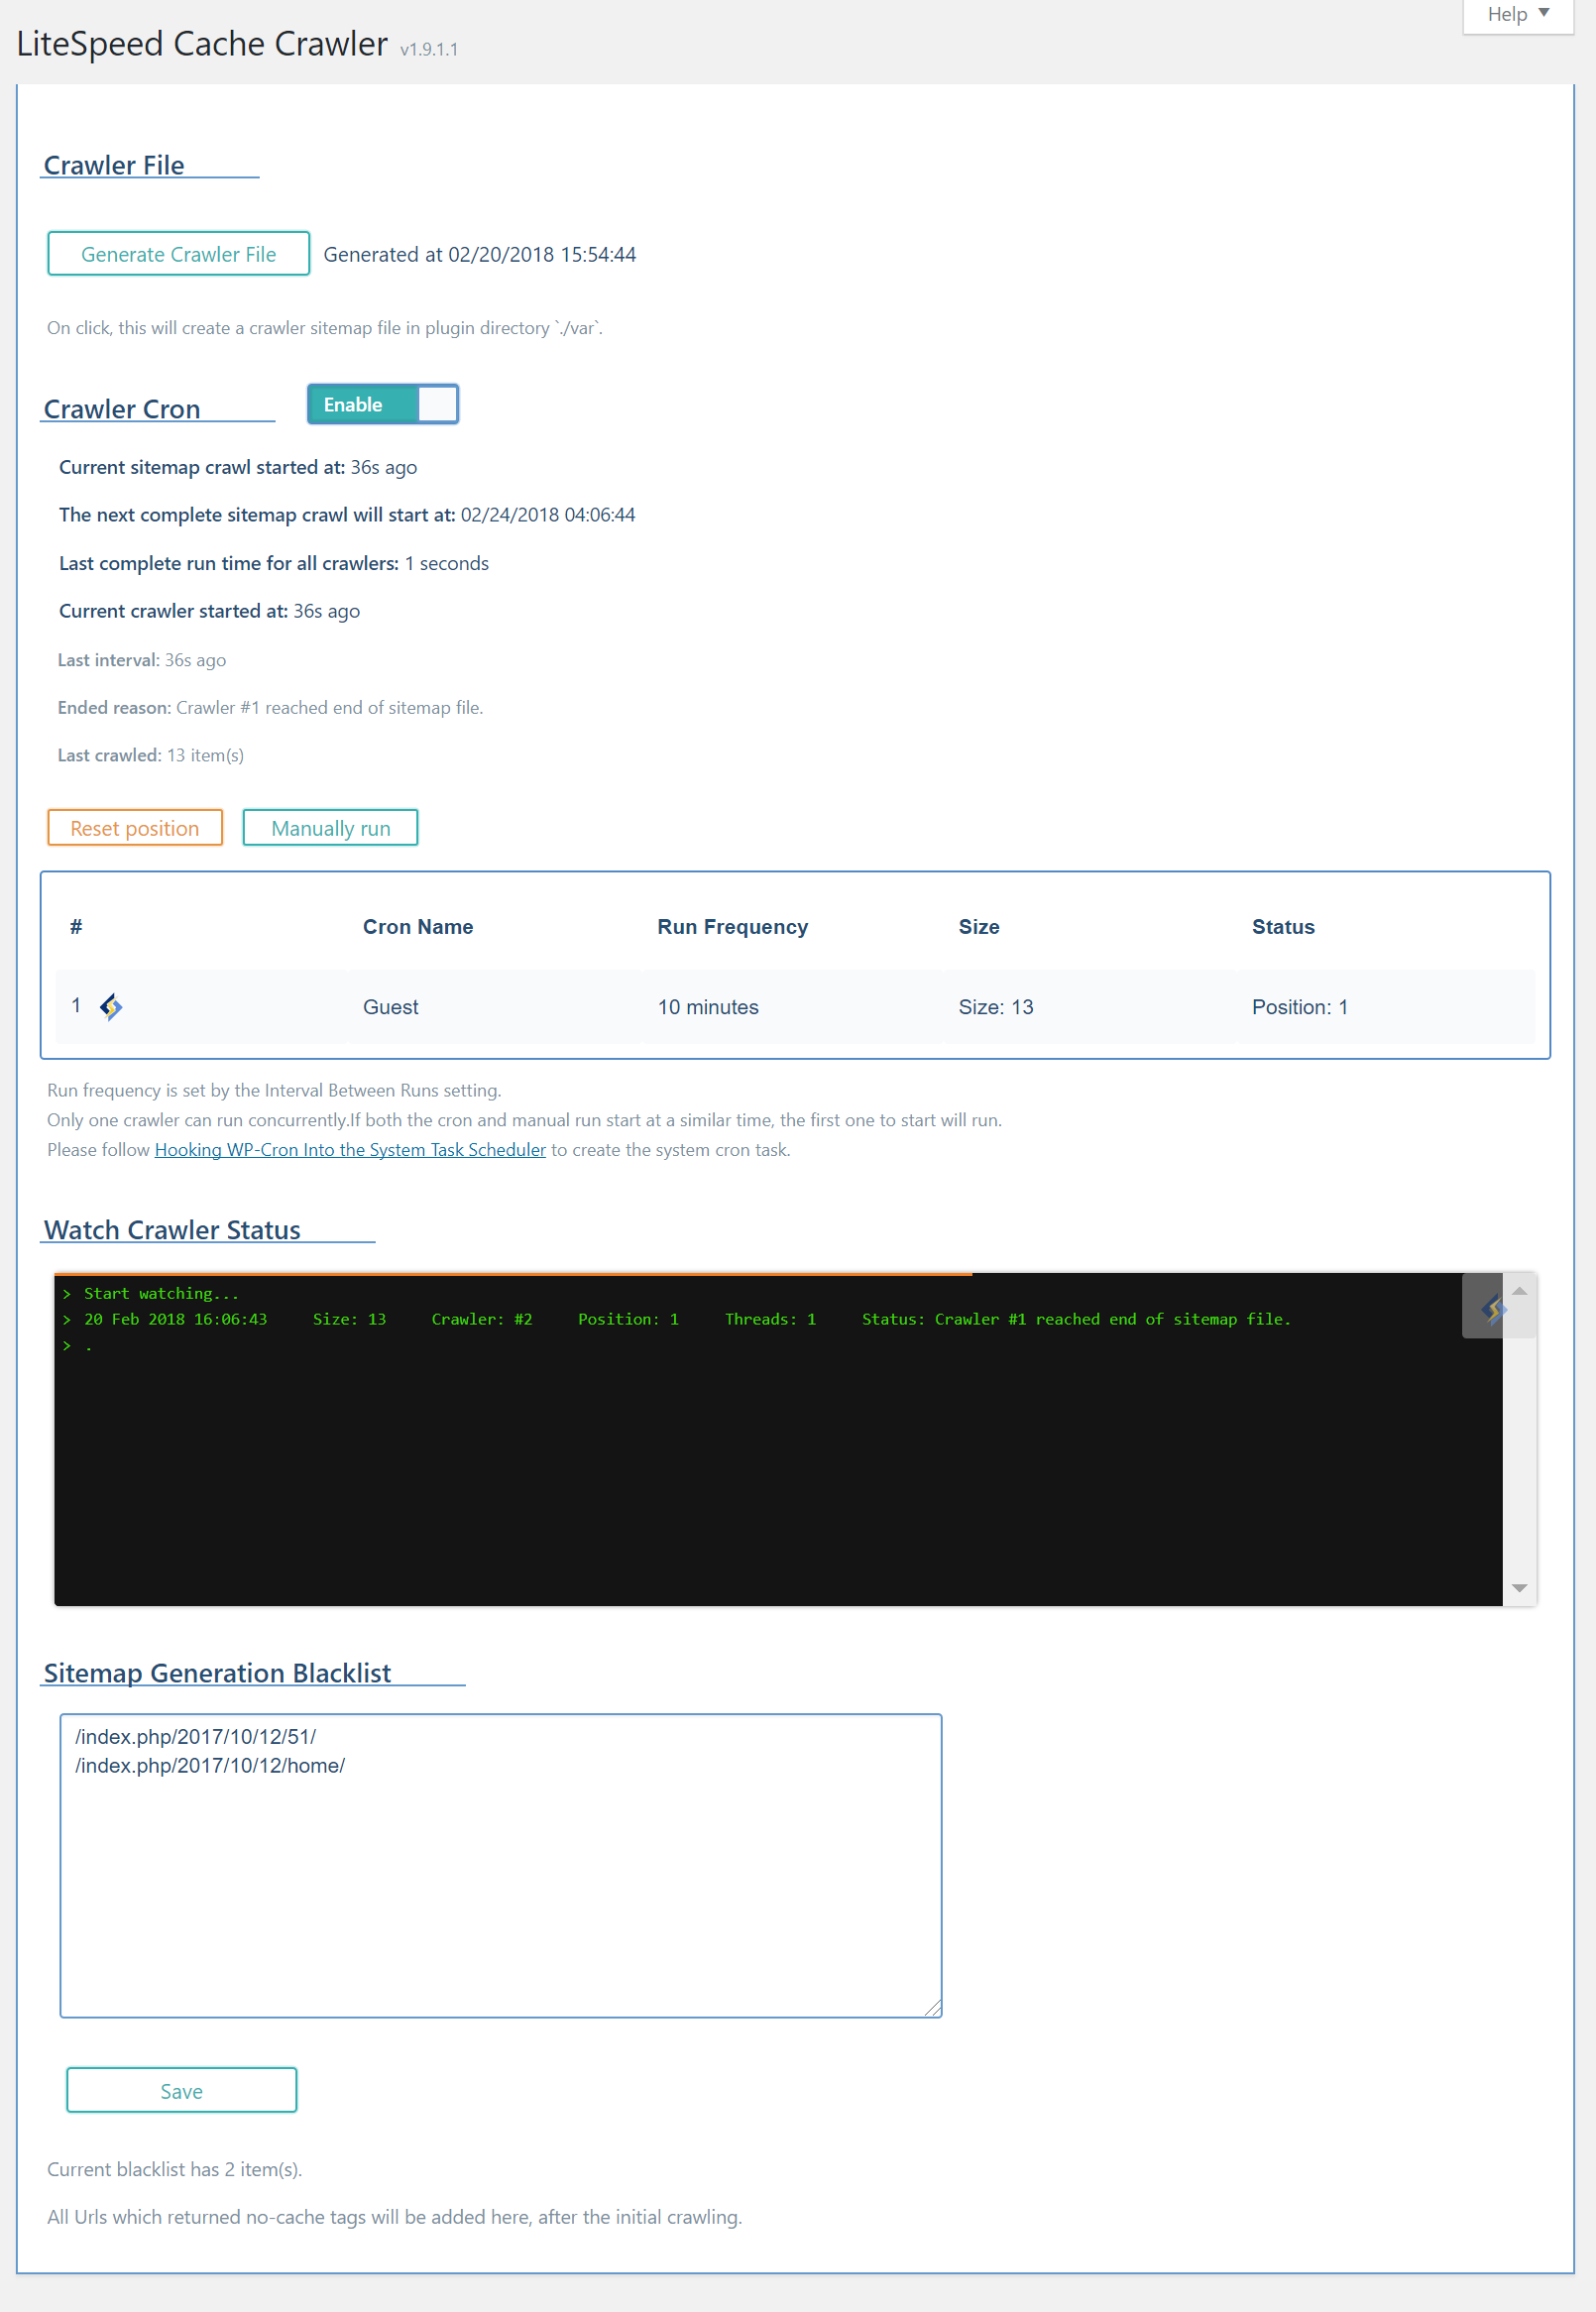
If you've opted to watch the crawler status, your screen will look something like this. The messages in the status window will vary from these, as this screenshot was grabbed from a small installation with few pages to crawl.
If you wish to keep a particular path from being crawled, you may enter it in the Sitemap Generation Blacklist box and press Save. After the crawler has run for the first time, if it encounters any pages marked do-not-cache they will be added to this Blacklist automatically.