This is an old revision of the document!
How to enable HA for Web ADC?
LiteSpeed Web ADC HA setup provides a failover setup for two ADC Nodes. When one node is temporarily unavailable, the other one will automatically detect and take over the traffic.
LiteSpeed Web ADC HA will use keepalived to detect the failover.
Two example Nodes
We will setup two nodes as an example:
Node1: 10.10.30.96
Node2: 10.10.30.97
Virtual IP: 10.10.31.31
Install and configure keepalived
Before you configure ADC HA, You should install keepalived on both node 1 and node 2. On CentOS, you can do yum install:
yum install keepalived
or on Ubuntu/Debian, you can do apt-get:
apt-get install keepalived
Then Start keepalived:
service keepalived start
Also need to setup autorestart during the system reboot:
systemctl enable keepalived
or
chkconfig keepalived on
The keepalive configuration file is located at /etc/keepalived/keepalived.conf, but you should not edit this configuration file directly, instead, you should use ADC Web Admin GUI → HA config to add/config VIP. The manually added VIP to keepalived config won't be picked up by ADC HA config. The VIP configure under ADC HA tab is just a GUI to update the keepalived config file. So you should just use the WebAdmin GUI to manage VIP if they want to see it in the status. We will explain on later steps on how to add VIP in GUI.
Configure HA on LiteSpeed Web ADC
Node 1
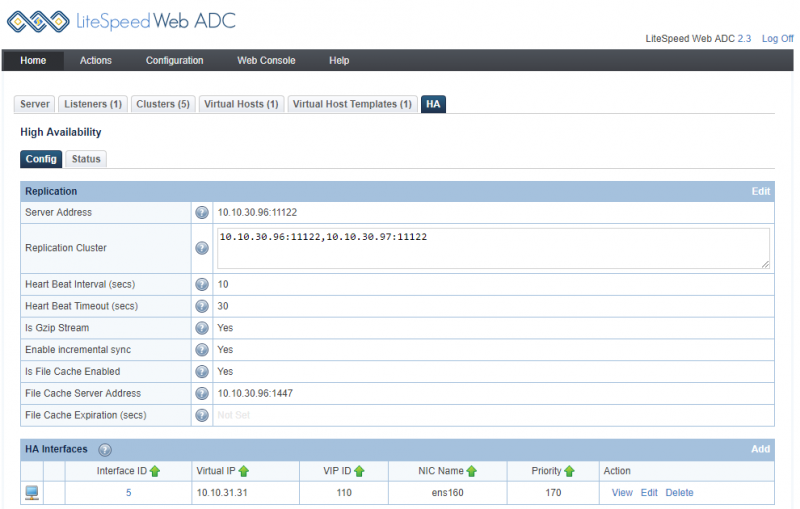
login to node 1 ADC Web Admin Console: sample configuration
Server Address	10.10.30.96:11122
Replication Cluster	10.10.30.96:11122,10.10.30.97:11122
Heart Beat Interval (secs)	10
Heart Beat Timeout (secs)	30
Is Gzip Stream	       Yes
Enable incremental sync      Yes
Is File Cache Enabled	       Yes
File Cache Server Address  10.10.30.96:1447
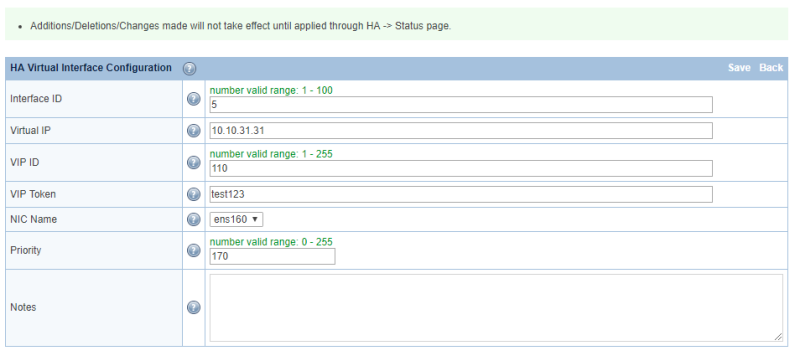
then “Add” HA interface:
After VIP has been added through GUI, the configuration will be added to keepalived configuration and you will see keepalive configuration like:
vi /etc/keepalived/keepalived.conf
###### start of VI_5 ######
vrrp_instance VI_5 {
  state BACKUP
  interface ens160
  lvs_sync_daemon_inteface ens160
  garp_master_delay 2
  virtual_router_id 110
  priority 170
  advert_int 1
  authentication {
      auth_type PASS
      auth_pass test123
  }
  virtual_ipaddress {
      10.10.31.31
  }
}
###### end of VI_5 ######
Node 2
login to node 1 ADC Web Admin Console: sample configuration
Server Address	10.10.30.97:11122
Replication Cluster	10.10.30.96:11122,10.10.30.97:11122
Heart Beat Interval (secs)	10
Heart Beat Timeout (secs)	30
Is Gzip Stream	       Yes
Enable incremental sync      Yes
Is File Cache Enabled	       Yes
File Cache Server Address  10.10.30.97:1447
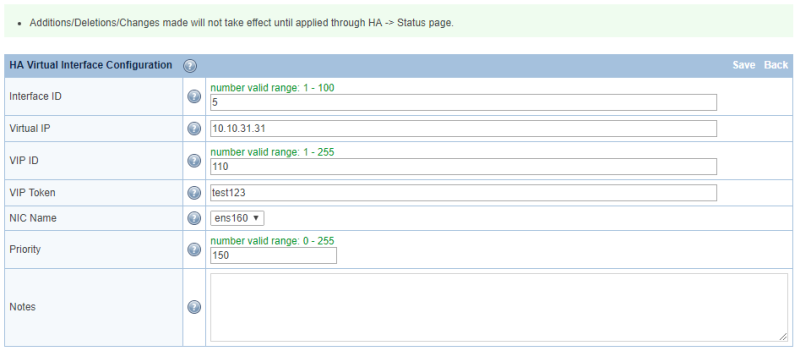
After VIP has been added through GUI, the configuration will be added to keepalived configuration and you will see keepalive configuration like:
###### start of VI_5 ######
vrrp_instance VI_5 {
  state BACKUP
  interface ens160
  lvs_sync_daemon_inteface ens160
  garp_master_delay 2
  virtual_router_id 110
  priority 150
  advert_int 1
  authentication {
      auth_type PASS
      auth_pass test123
  }
  virtual_ipaddress {
      10.10.31.31
  }
}
###### end of VI_5 ######
Note:
- node1 virtual_router_id should be the same as node2;
- “state MASTER/BACKUP” doesn't really matter, since Higher priority one will be MASTER.
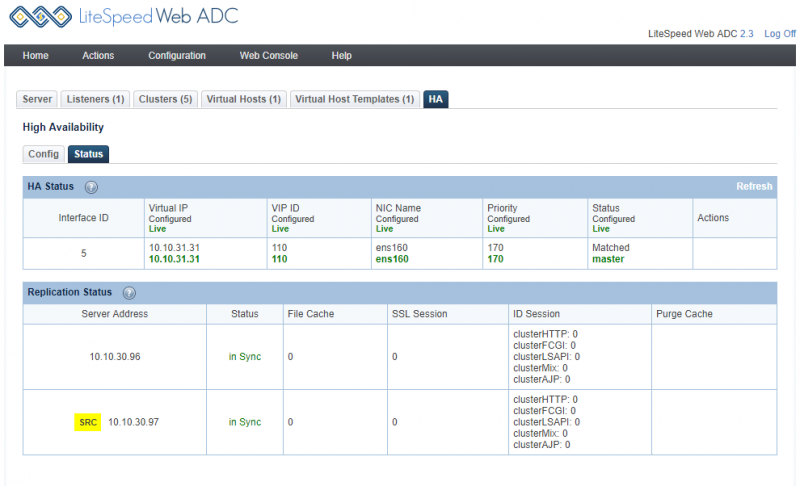
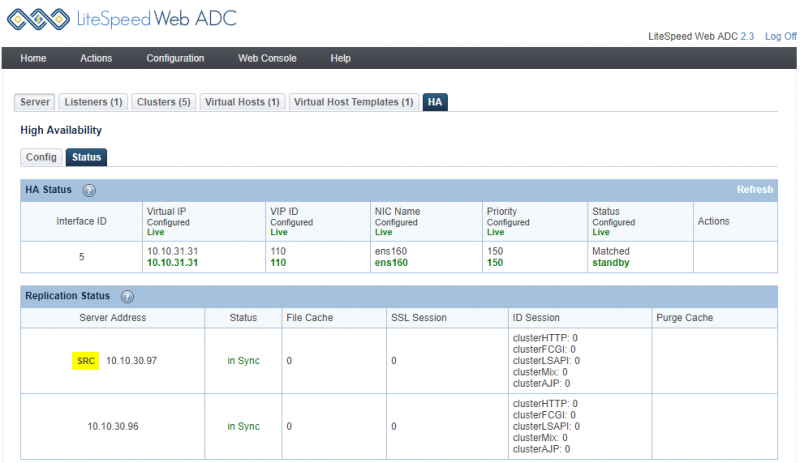
Check HA Status for both nodes
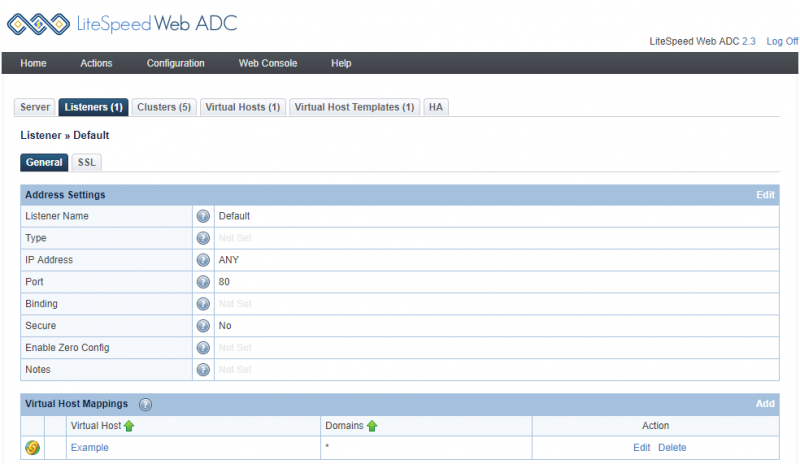
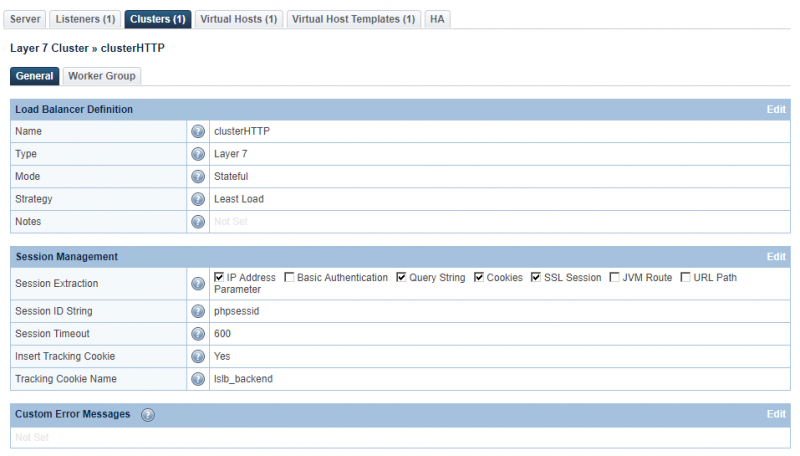
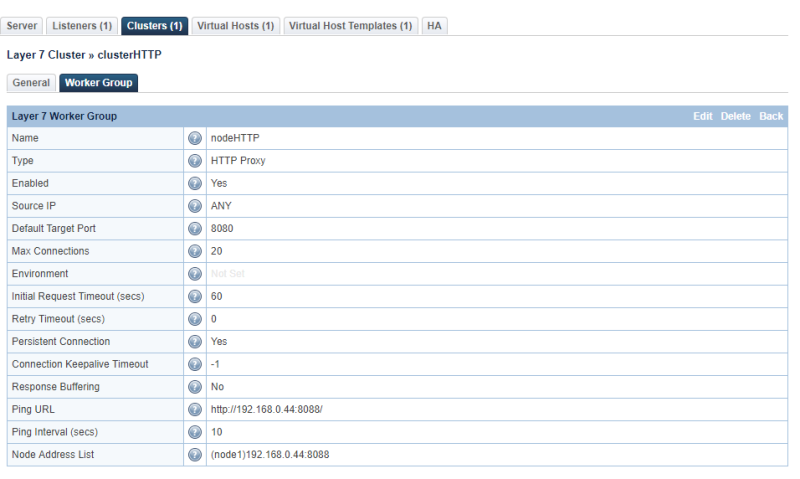
Verify your listener,virtualhost, ClusterHTTP setup correctly
Assuming you have configured the listener, virtual Host and backend clusterHTTP on both Node 1 and node 2 seperately.
Testing VIP
Try access 10.10.31.31 (VIP) from the browser, you will see the backend server page. Disable one node, you can still see the webpage. Check ADC HA status, live node will become Master when the other one down.
