This is an old revision of the document!
Image Optimization in LiteSpeed Cache for WordPress
As of v1.6, LSCWP has the ability to optimize your images, making them smaller, and faster to transmit. For now, you will have to press a button to optimize each new batch of images, but it will be possible to configure it to be an automatic process in a later version of the plugin.
IMPORTANT: Please do NOT use other image optimization plugins alongside LSCWP's image optimization. This can cause undesirable behavior, including processing errors that require LiteSpeed staff to manually clear. Choose one image optimizer and stick with that one!
Using the Image Optimization Page
Before You Begin
There are a few settings you may want to adjust before you request image optimization. For instance, by default we optimize your JPG/PNG images, and also create WebP versions of each image. You may choose to only create WebPs and forgo the JPG optimization.
See LSCWP Configuration Settings: Media for more information. (The Image Optimization settings can be found below those for Lazy Load.)
Optimization Summary
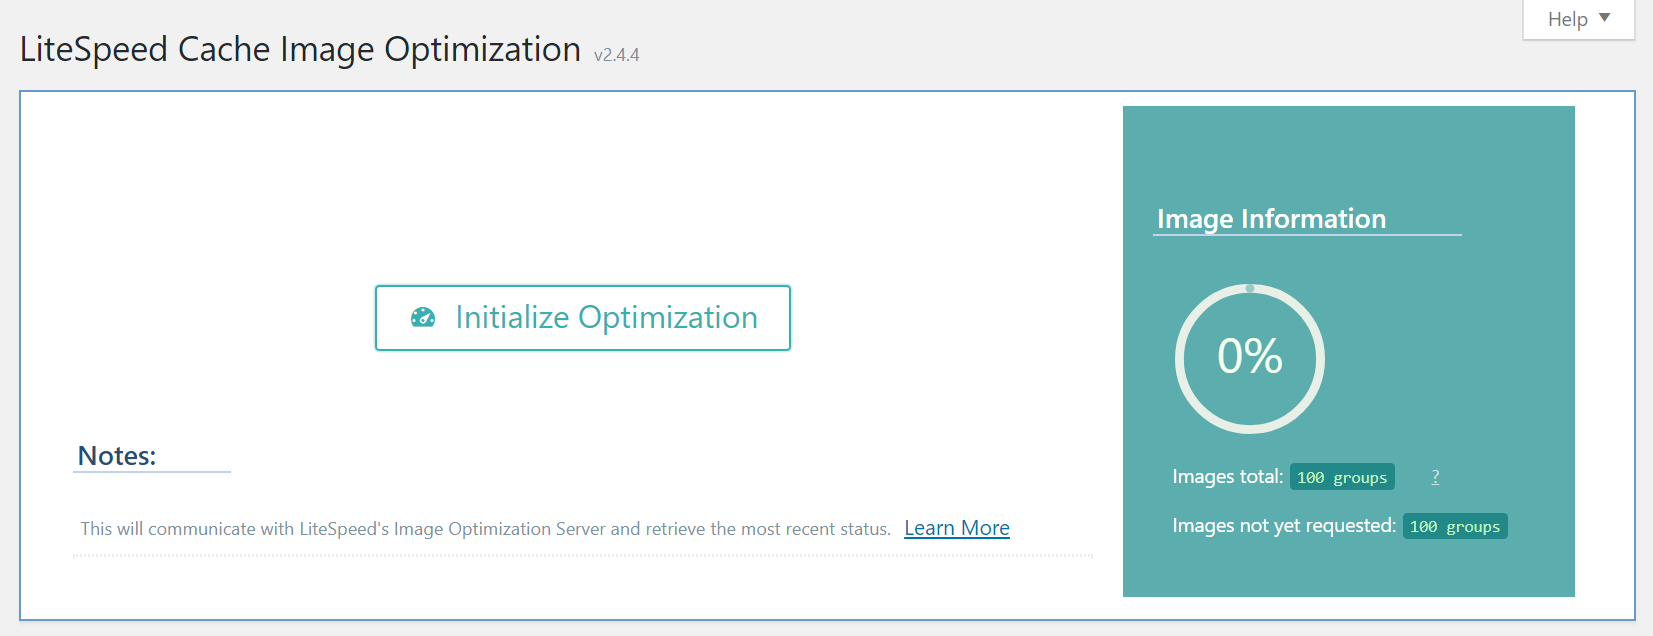
The first time you visit this page, you will see a button that reads Initialize Optimization. Press the button to obtain a key from the central server that it will use to process all of your future image optimization requests. This key isn't displayed, but it is saved as a part of your Environment Report, if we need to refer to it later for any reason.
Optimization Summary should now look like this:
You'll see there is now information displayed there: Level, Credit, Image Information and Optimization Summary. The information displayed there will change after you submit your first request:
The Credit System
In an effort to prevent the Image Optimization Server from getting too bogged-down with requests, we've implemented a credit system.
Each site is assigned a level. Levels start at 1 and increase as the site continues to frequently use the service. Currently there are seven established levels, and each level has an assigned number of image optimization credits (see below). Credits represent the maximum number of images you may currently submit for optimization. Credits regenerate at the completion of an optimization cycle.
Example
Credits: 100
You submit 25 images be optimized. Credits: 75
You submit another 30 images to be optimized: Credits: 45
Your first 25 images finish processing and are pulled. Credits: 70
The next 30 images finish processing and are pulled. Credits: 100
Credits per Level
- Level 1: 100
- Level 2: 500
- Level 3: 1500
- Level 4: 3000
- Level 5: 5000
- Level 6: 7000
- Level 7: 9000
Once you reach Level 3, we can reasonably assume that your server and ours are communicating well. At this point, Image Optimization will begin to happen automatically, if you have that setting enabled in Media Settings.
Submitting Your First Request
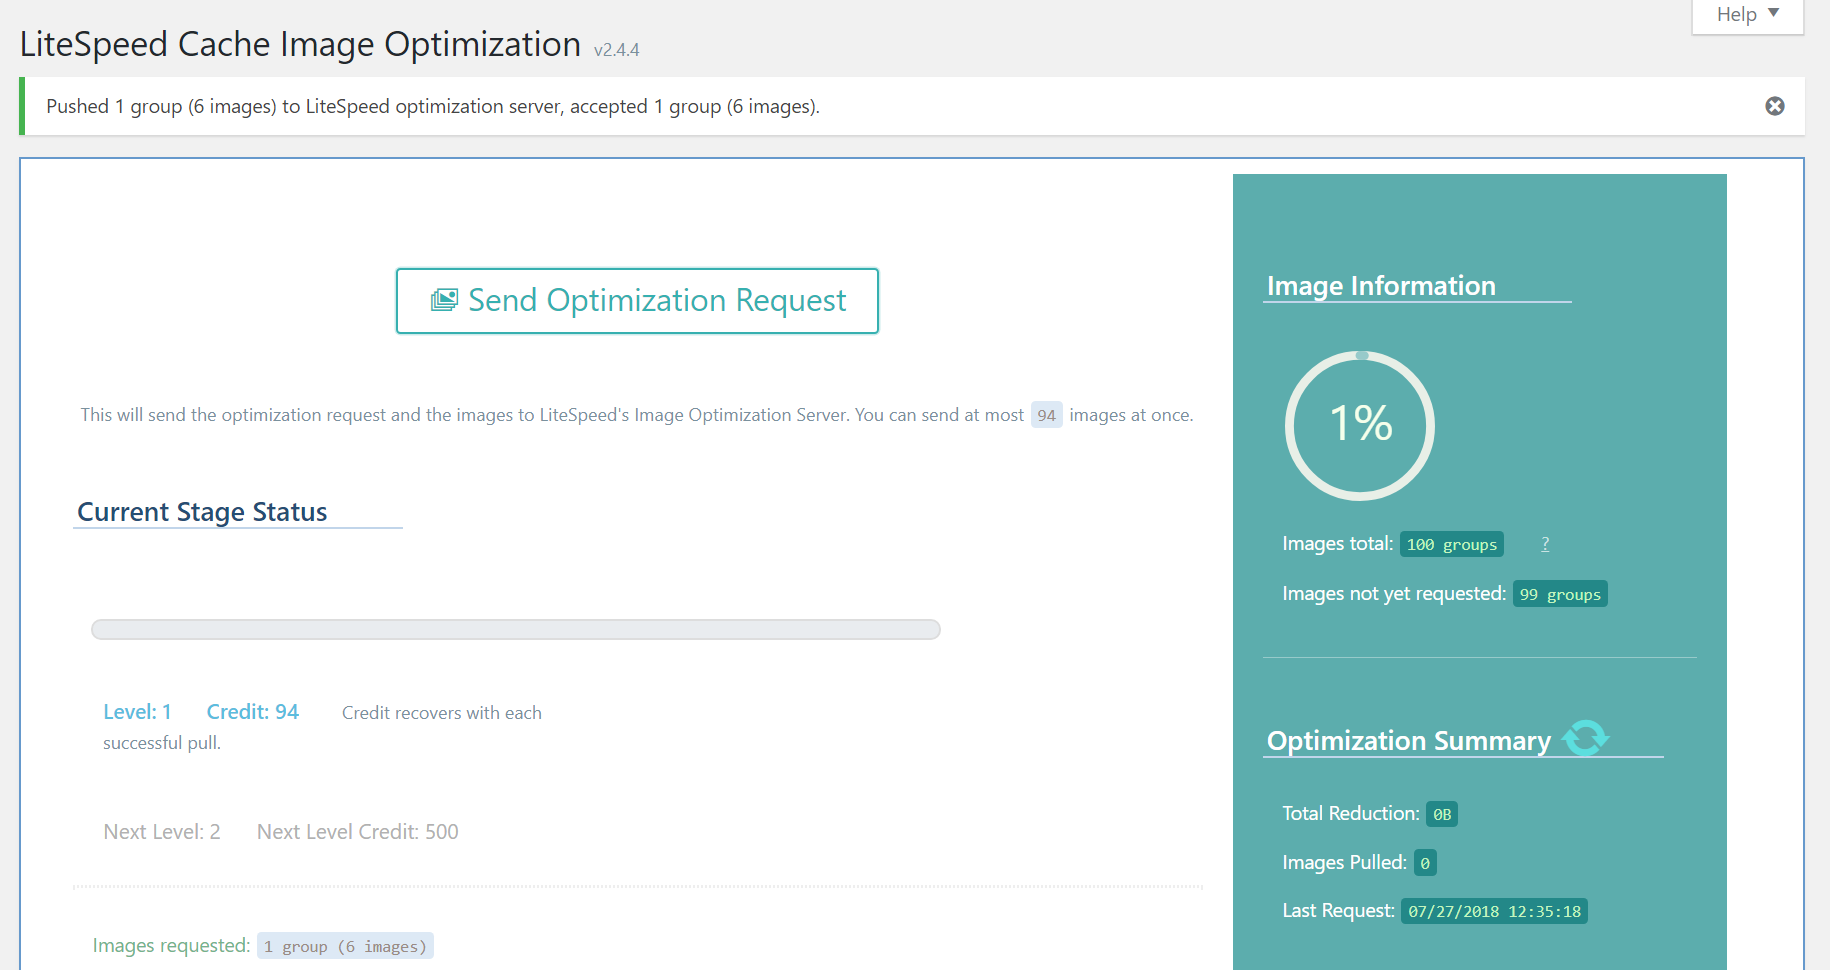
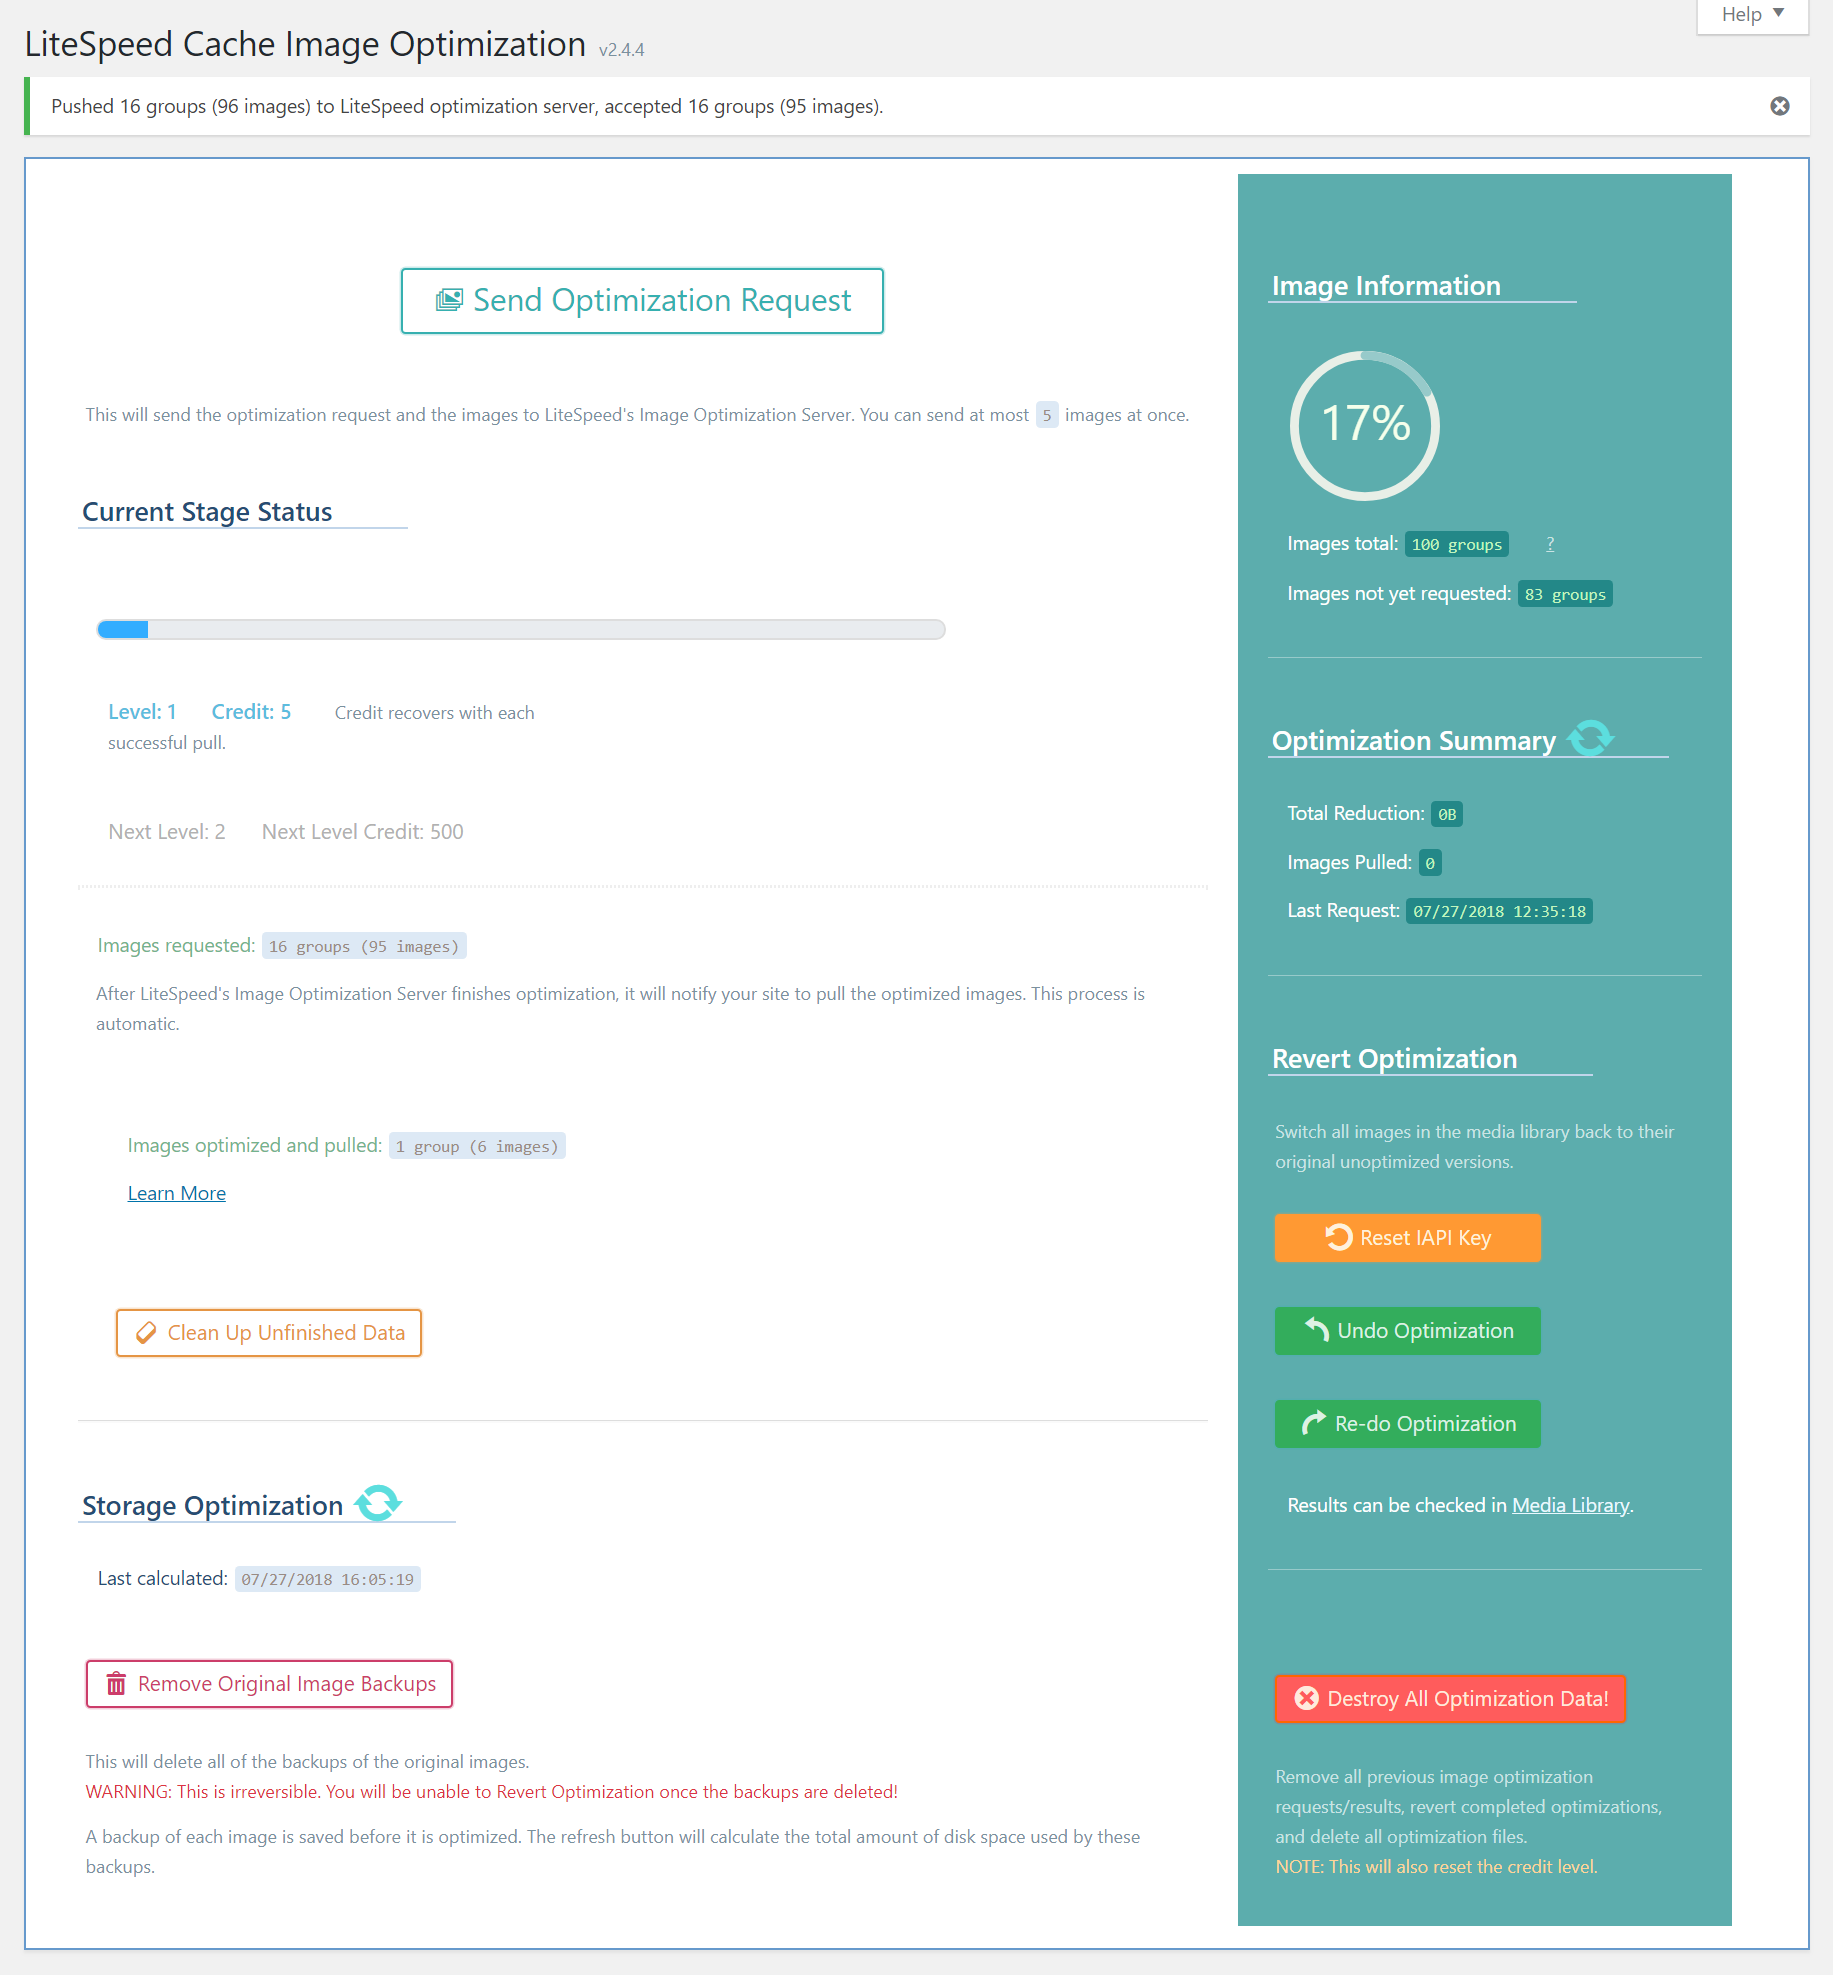
Press Send Optimization Request. Only one group of images is sent this first time. We want to make sure everything is working well between your server and ours, and so we start small. You don't need to wait on this page. You can go away and do something else if you like.
None of the status information is updated automatically, so to see the latest, you will need to press the circular arrow button next to Optimization Summary.
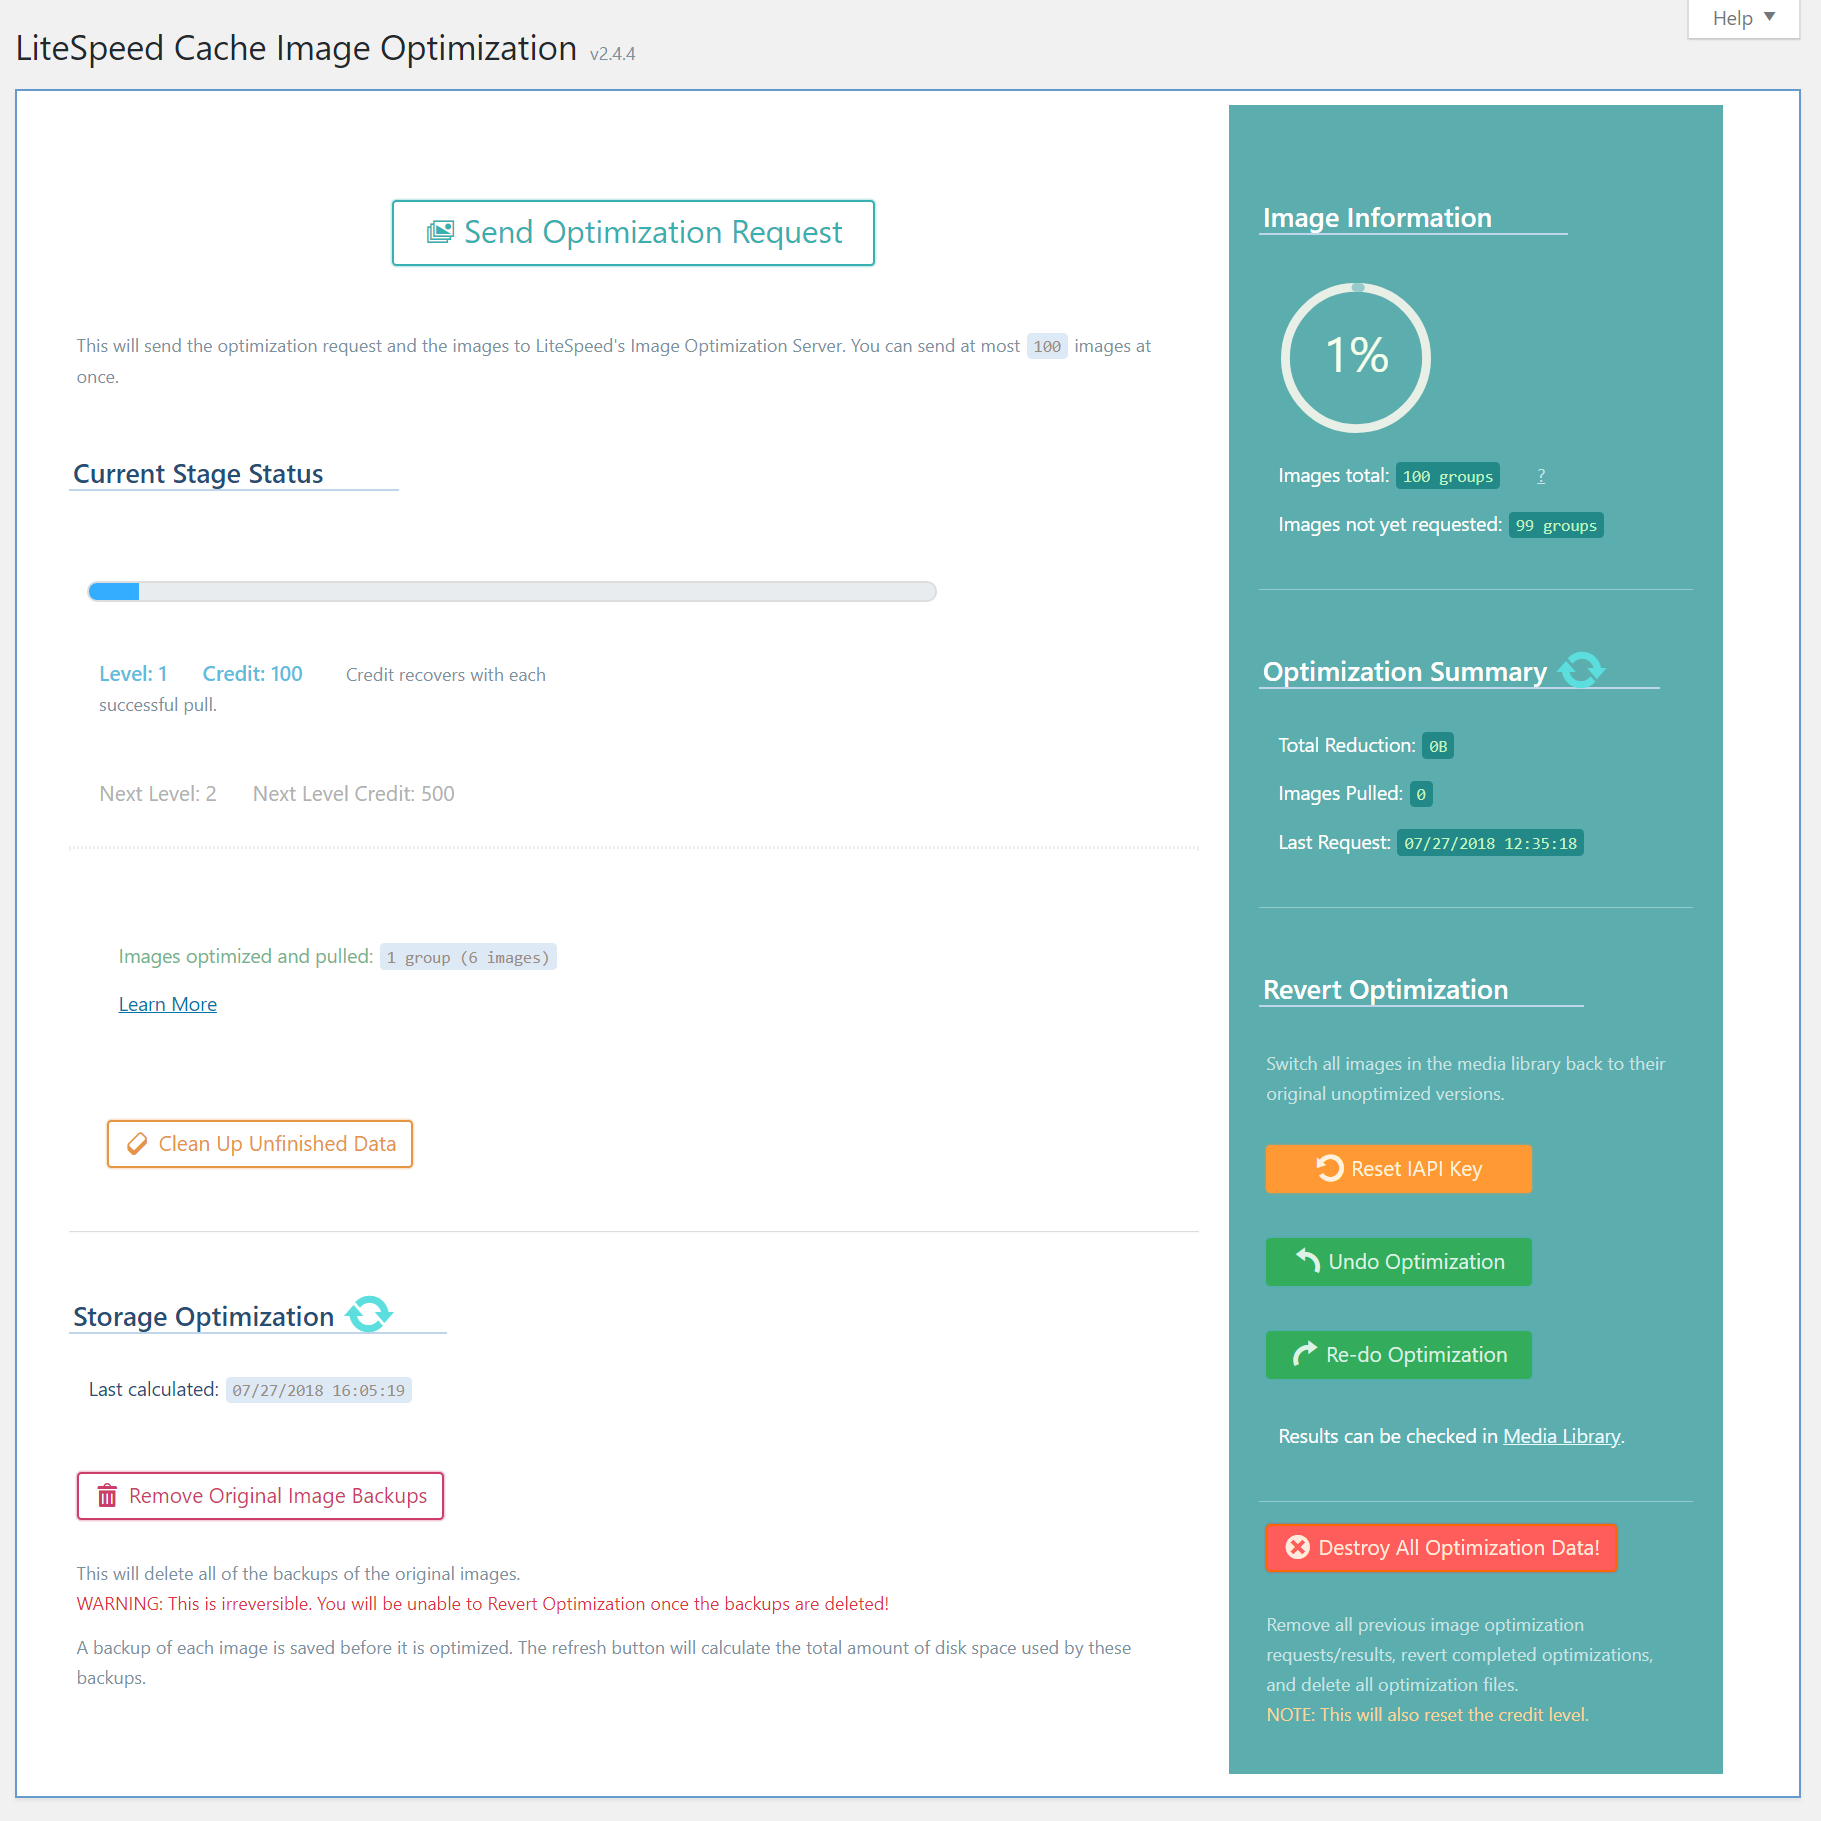
Once your first group of images has finished optimizing and has been pulled back to your system (either through the cron or by pressing the Pull Images button), you can start sending larger groups of images. Press Send Optimization Request.
You'll see some changes in the status messages below, letting you know how many images were requested, how many were pulled, and if there were any errors, you'll see that there, too.
When images are ready to pull, you can wait for the cron to do it automatically, or, if you have disabled the pull cron job (or your cron in general), you can press the Pull Images button to initiate the process manually. It is not necessary to press the button if your cron is running normally.
After a few batches, you will level up.
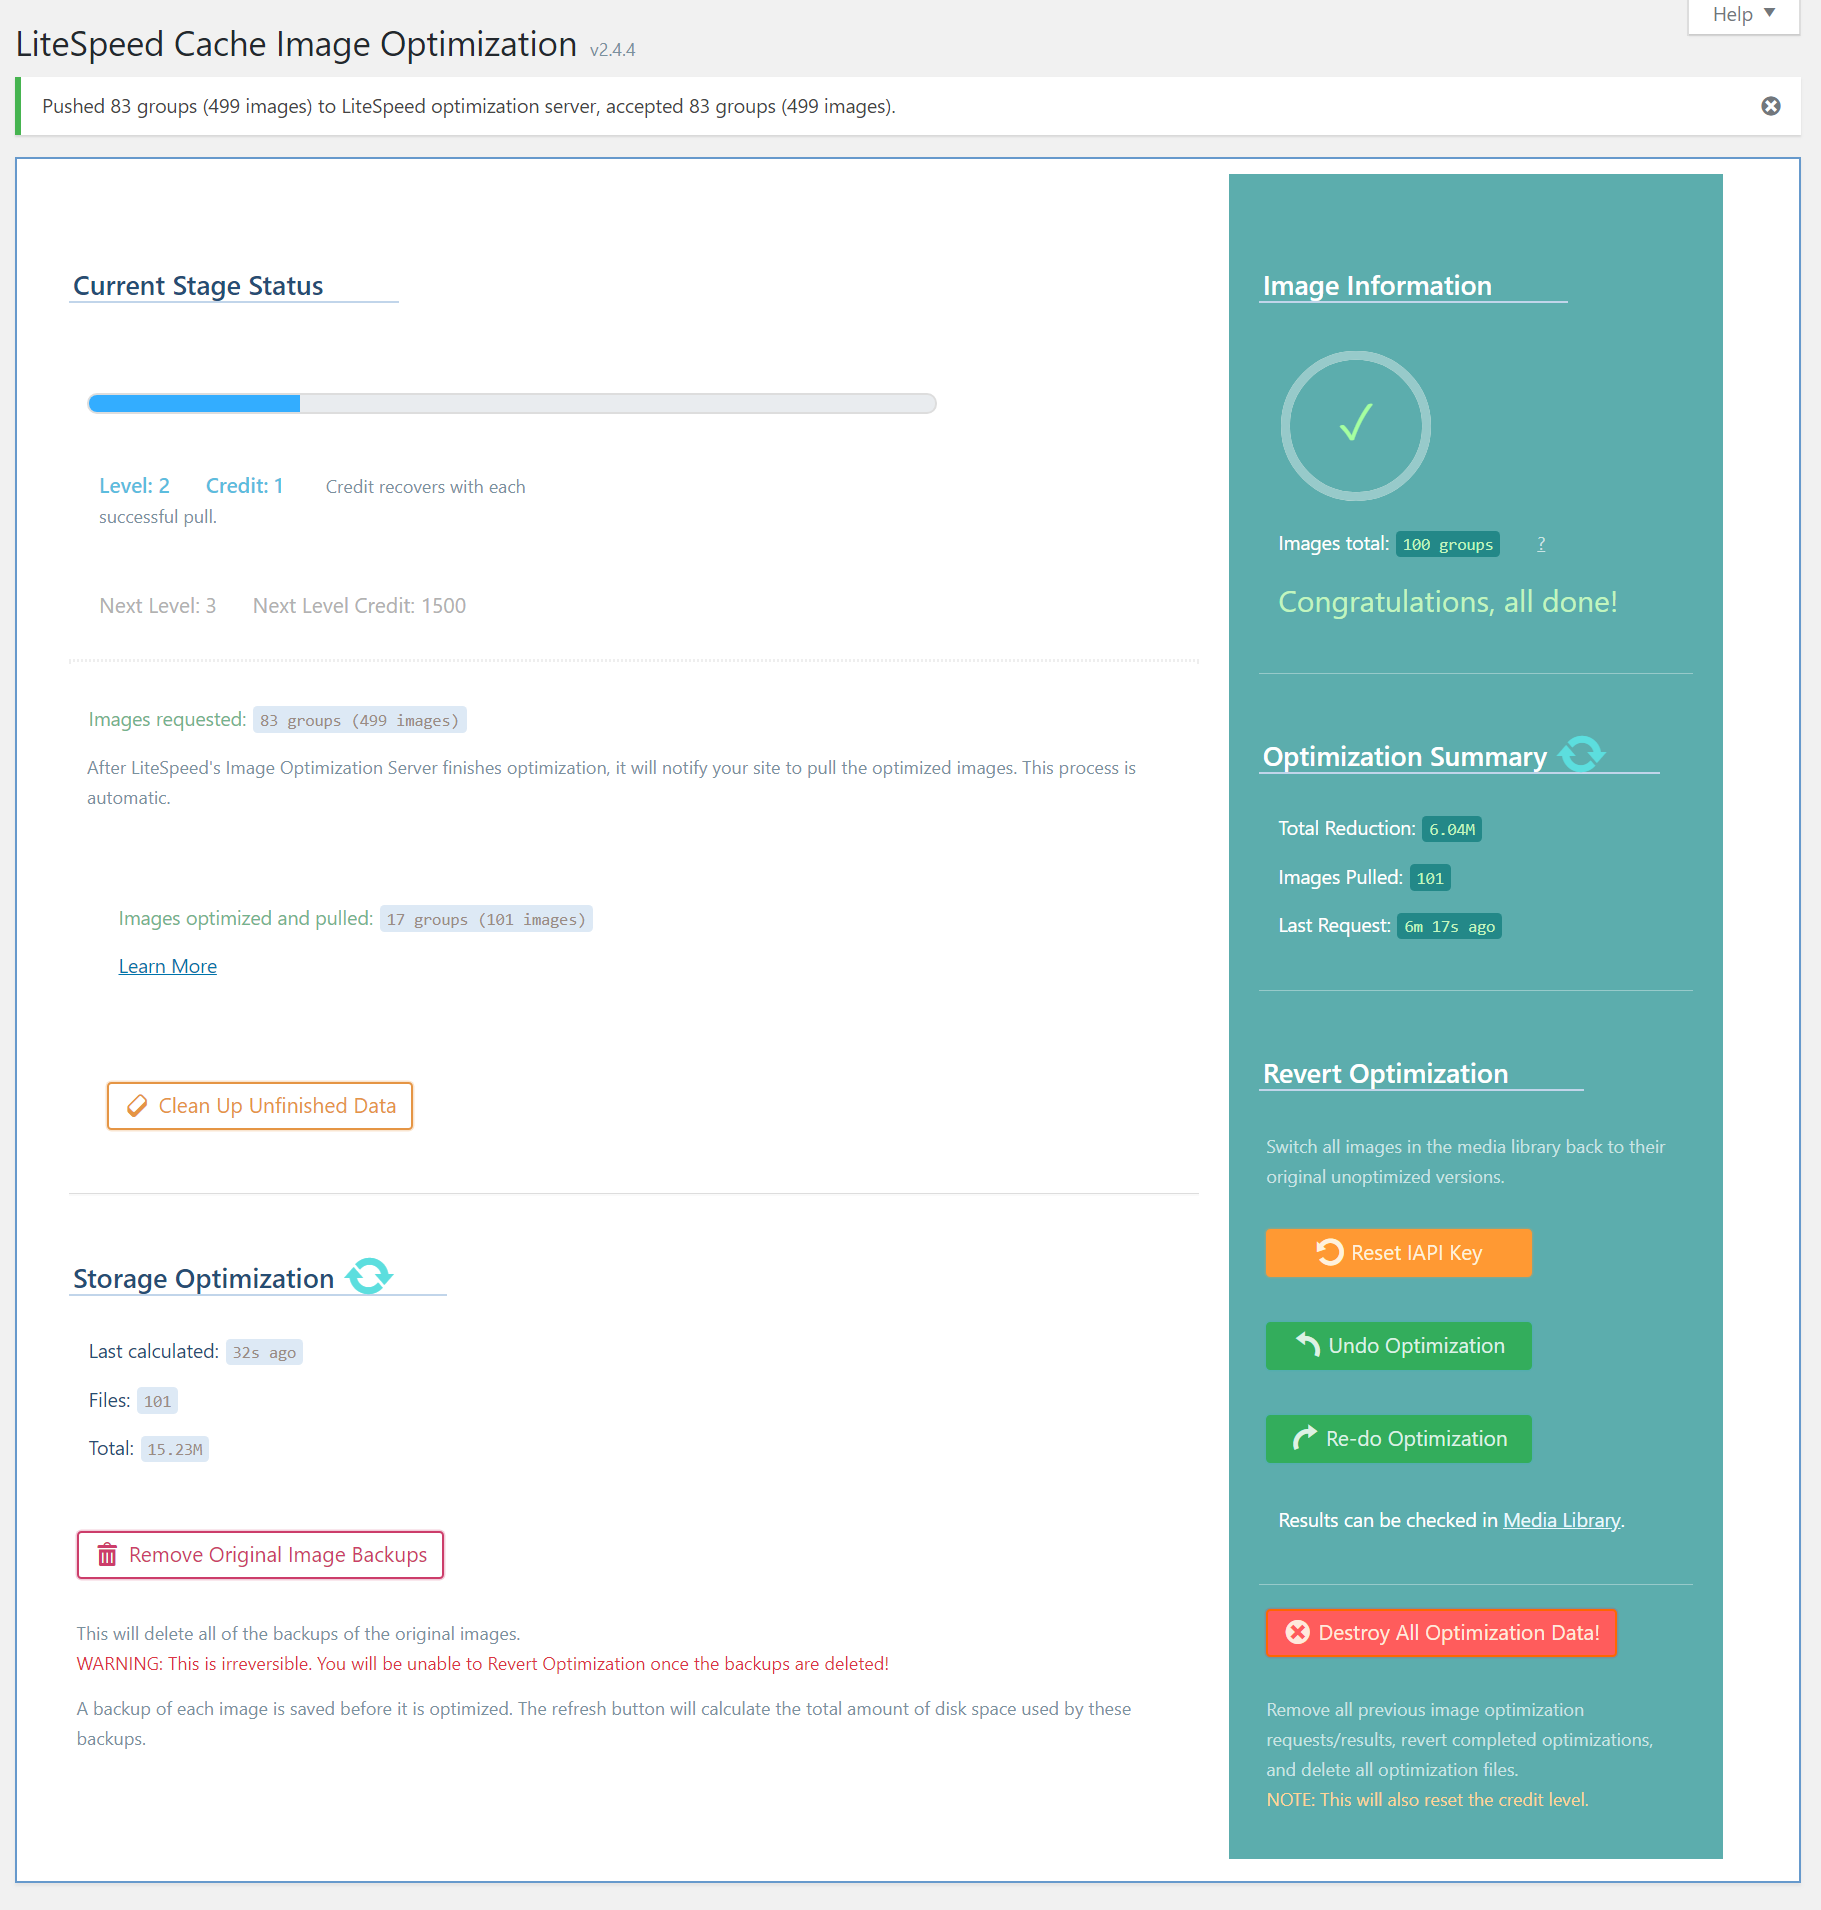
Once you reach Level 3 (1200 credits), if you've enabled it in the Media Settings, Image Optimization will be carried out automatically.
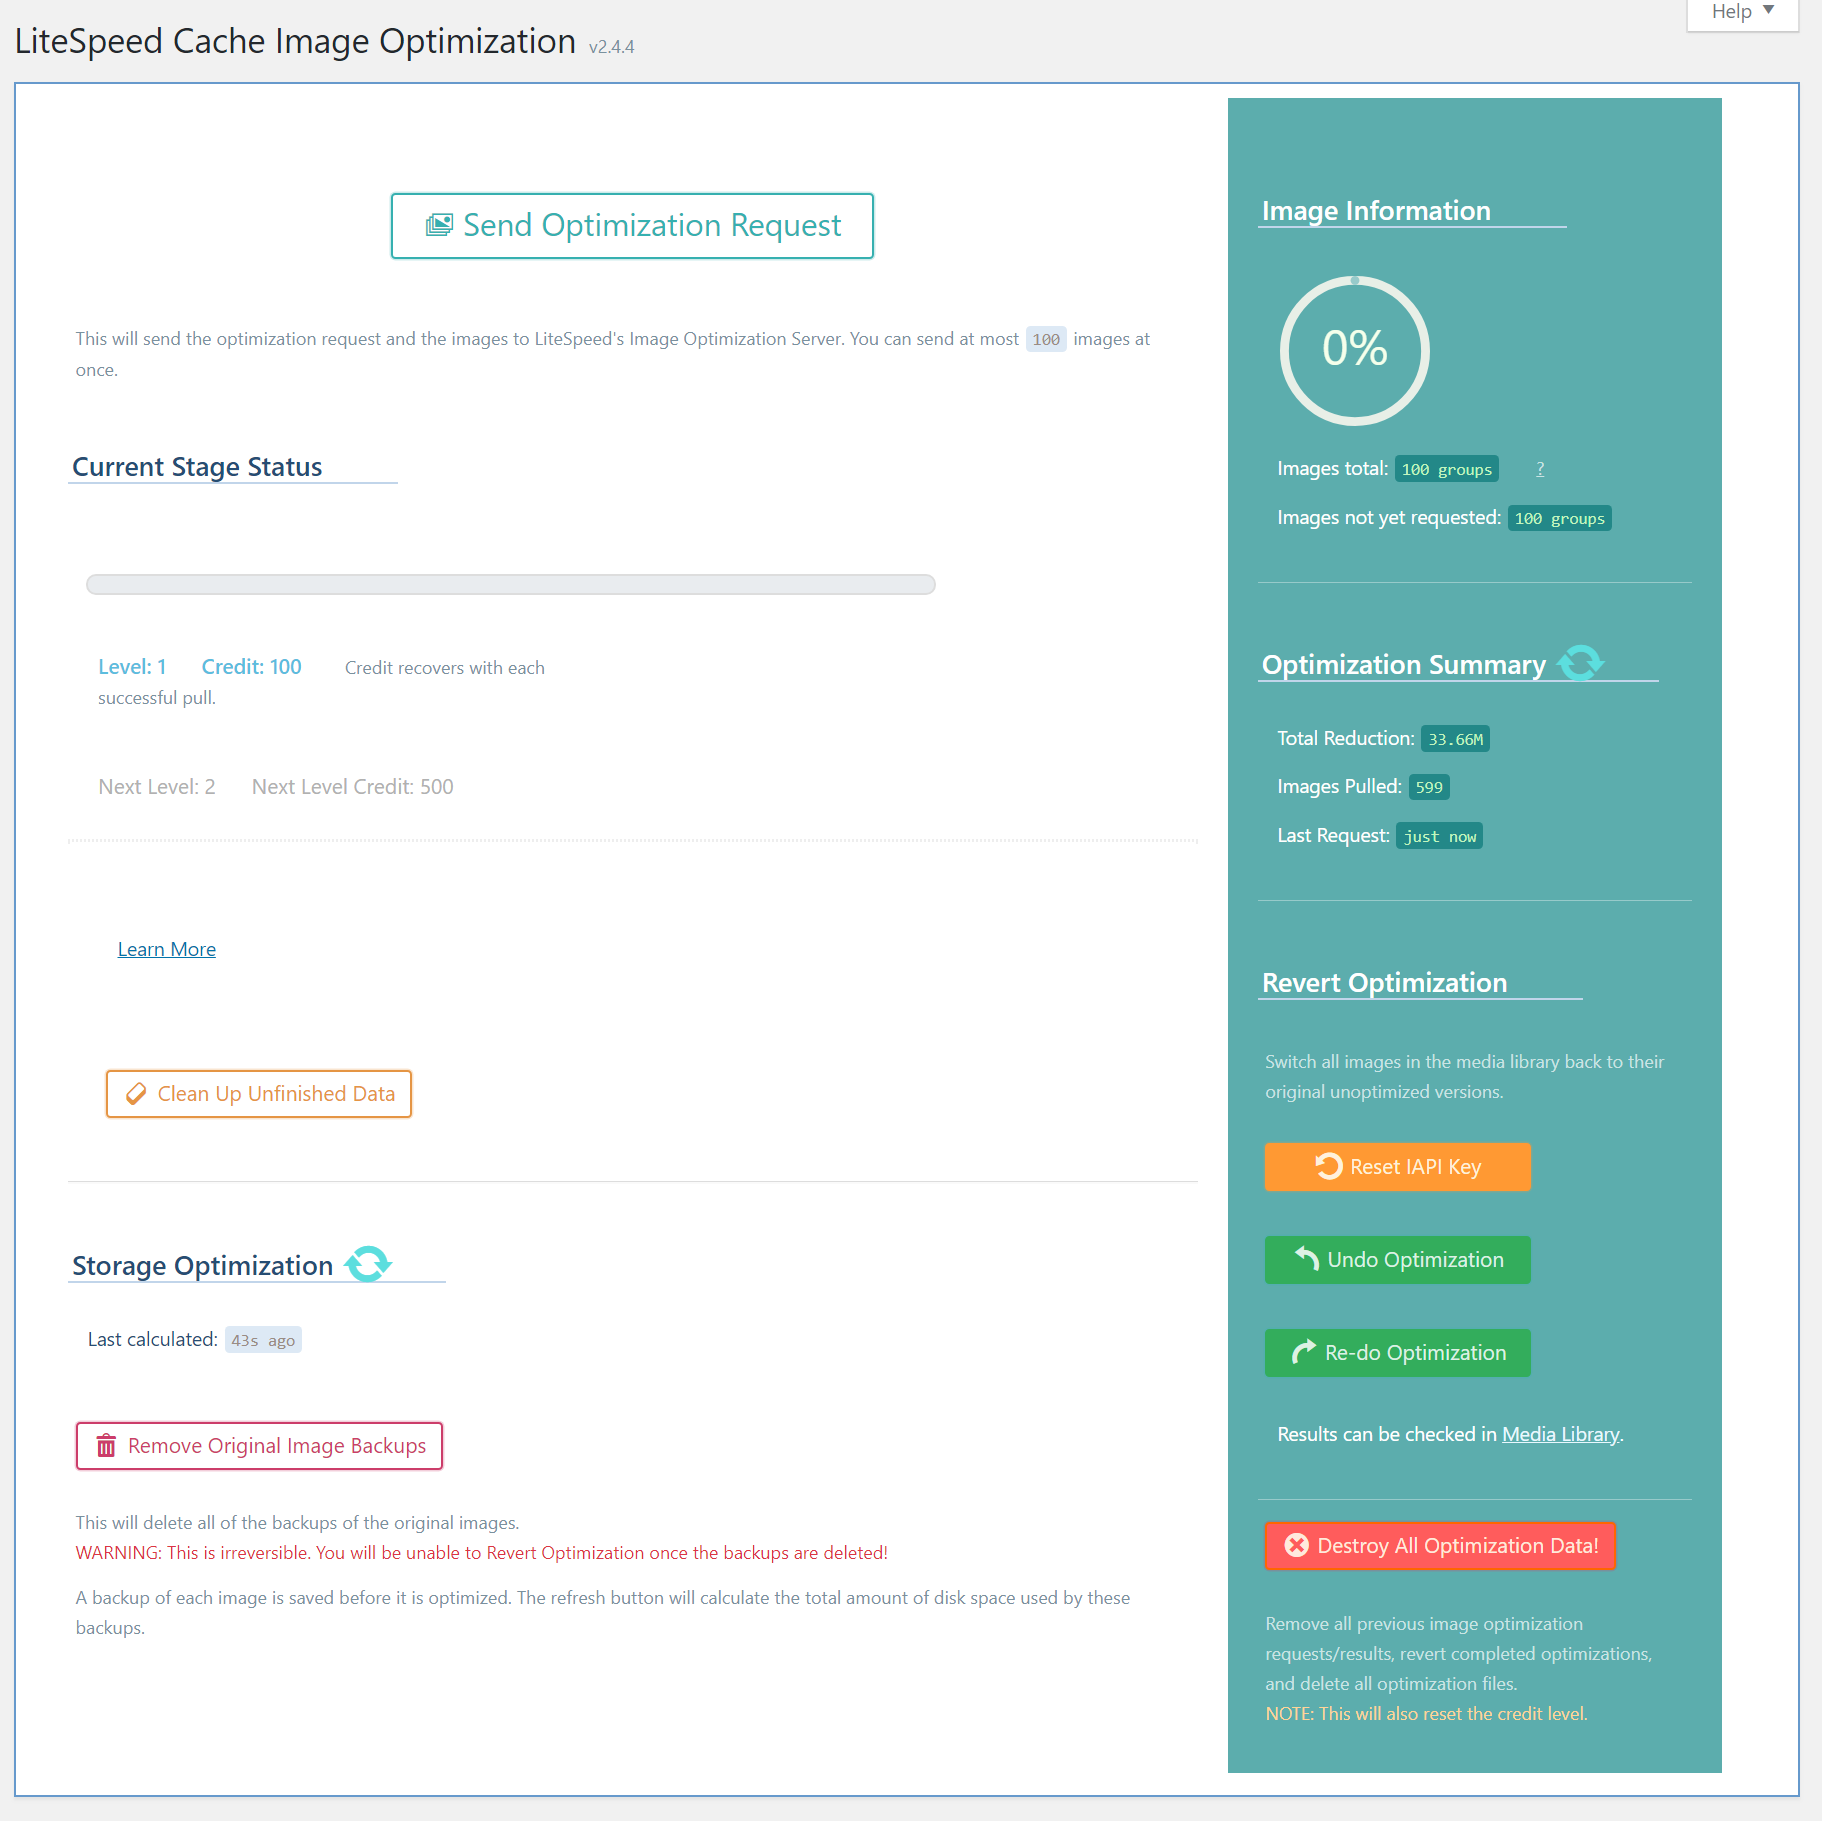
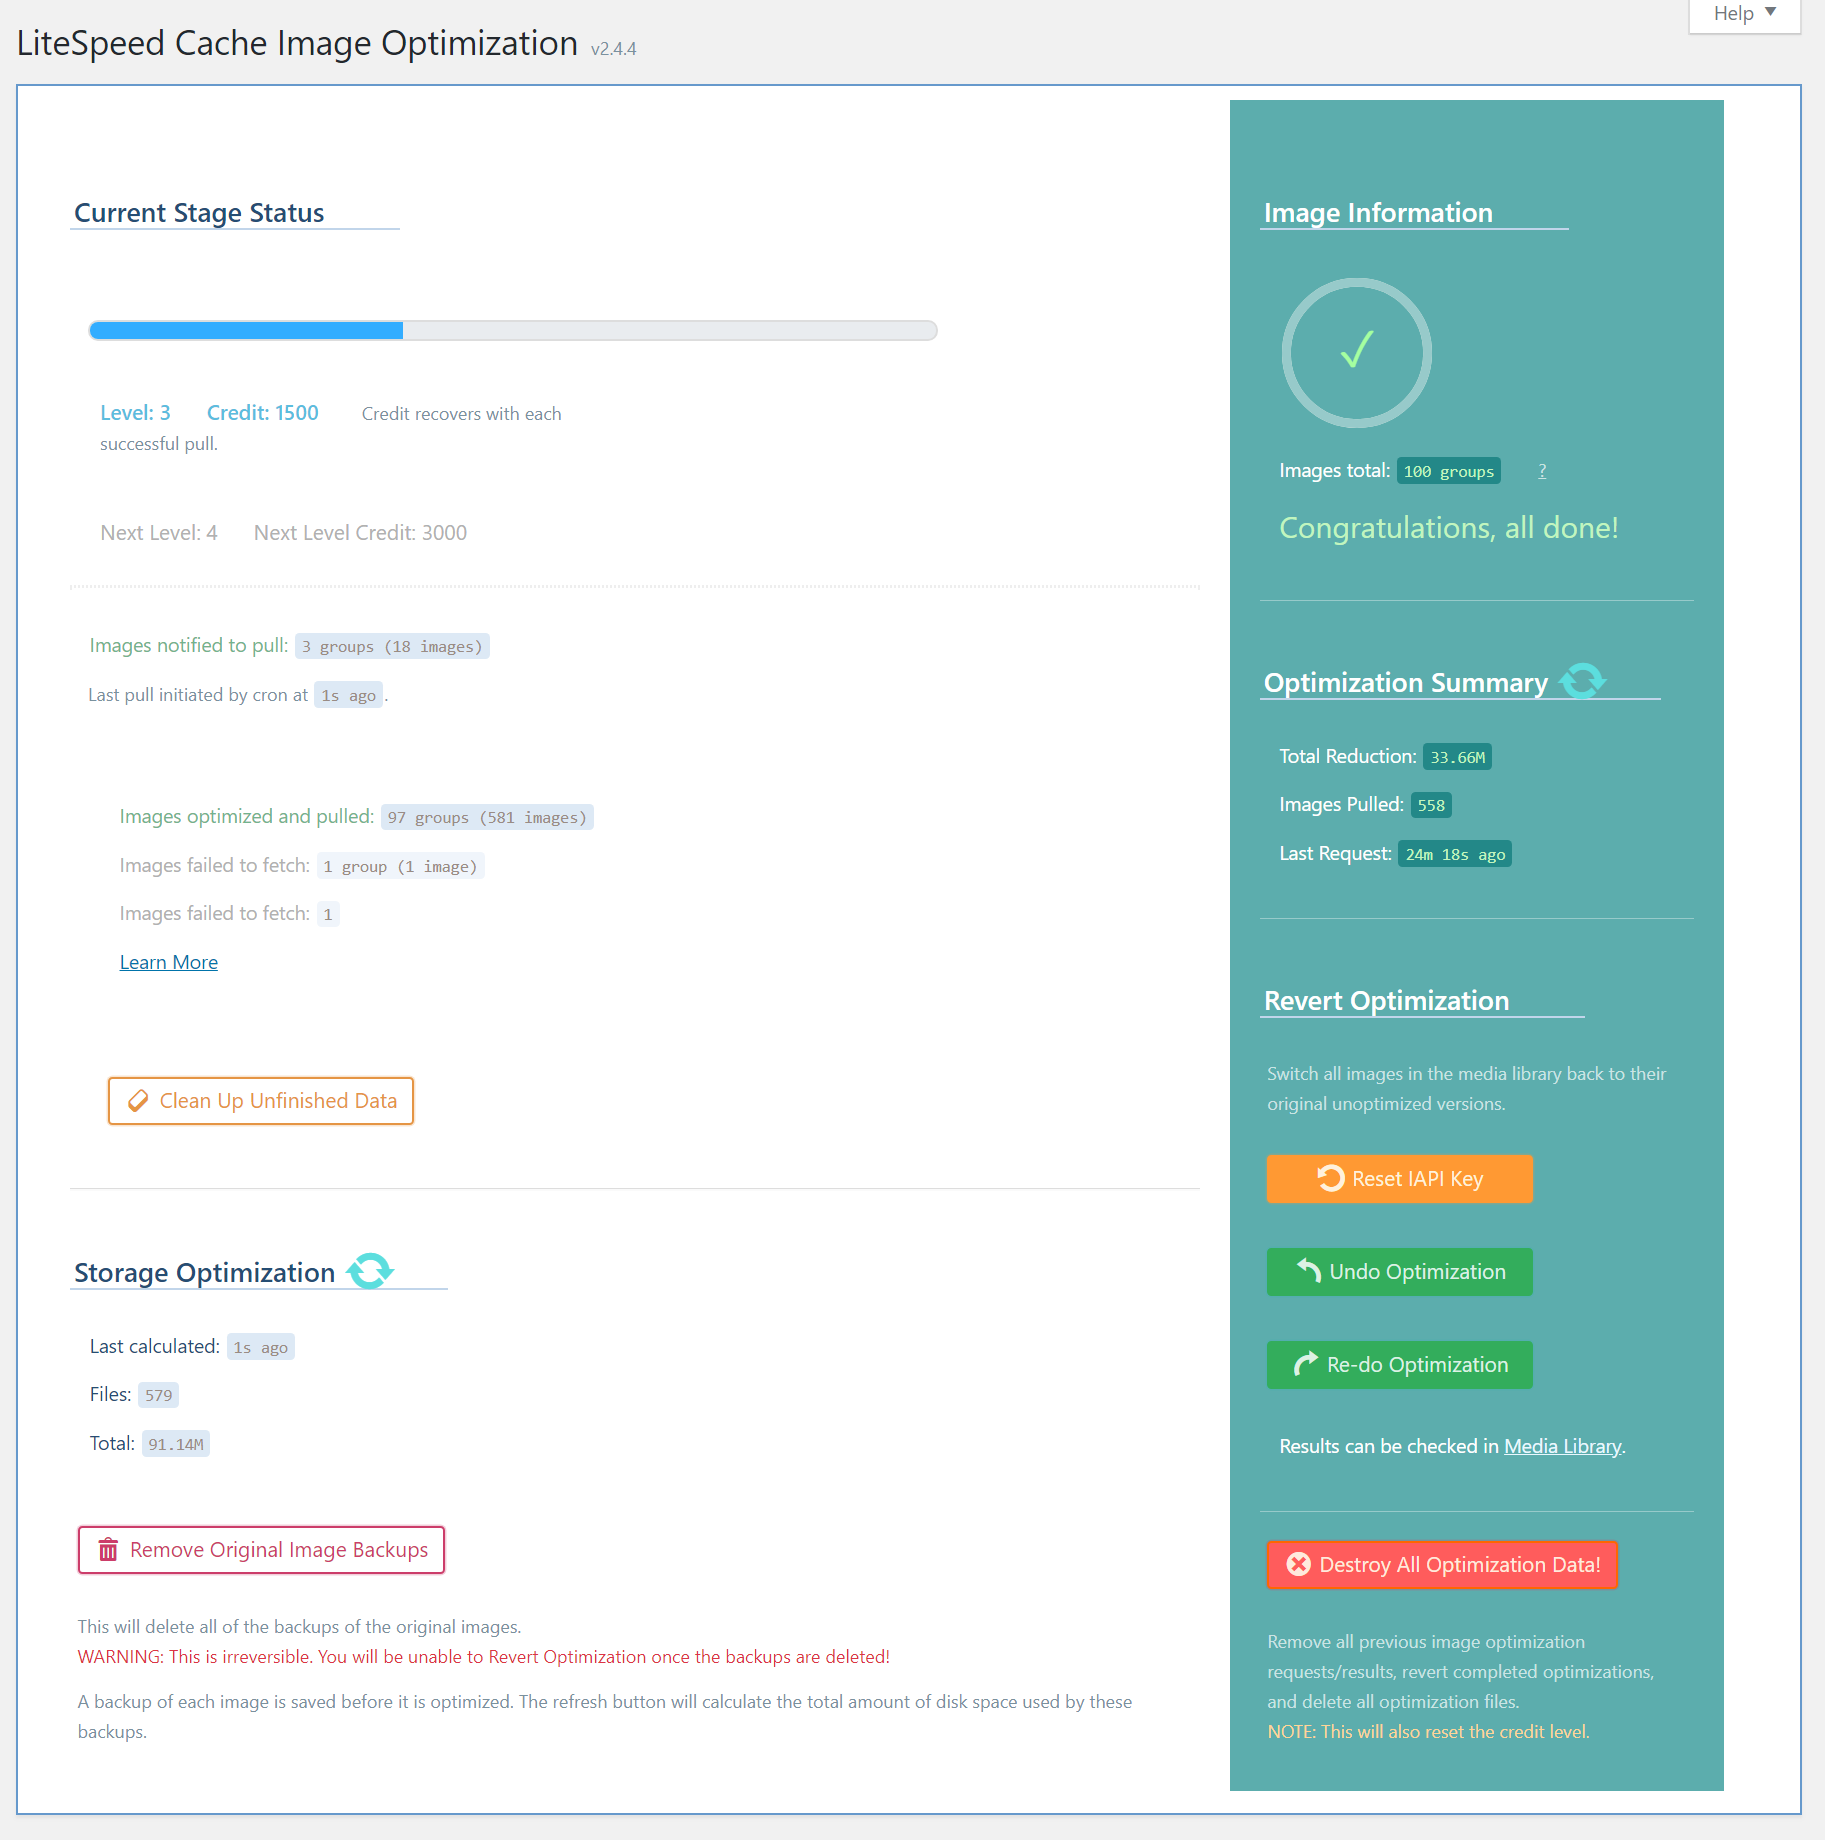
When optimization has completed for all of your site's images, your screen will look something like this:
Revert Optimization and Other Buttons
Undo Optimization
You may have decided that you no longer want optimized images on your site for whatever reason. You may use the Undo Optimization button to put everything back the way it was.
Re-do Optimization
If you change your mind again and decide you really do want the optimized images, no need to send a new request. Simply press the Re-do Optimization button, and the optimized versions will be restored.
There is no limit to the number of times you can press the above two buttons. Both versions live on your server, and may be switched in and out at will.
Send New Thumbnail Requests
Sometimes you make changes to existing images in your image library, and LSCache doesn't know about it. Use this button to re-scan your library and make LSCache aware of any images that have changed since the initial scan.
Reset IAPI Key
If your domain name has changed since you initially ran Image Optimization (as may happen when you move a deveopment site into production, for instance), then you are going to see a “hash does not match” error. To correct this problem, you'll need to press this button to generate a new IAPI key. After that, you may try again to optimize your images.
Clean Up Unfinished Data
If you are getting errors during your optimization and have reached a point where you cannot continue, you can press this button. All data related to optimization requests that did not complete will be wiped from the database so that you may continue optimizing. Any images that were in progress will be treated as new the next time you request optimization.
Please note, if you do not find and address the underlying cause of any errors you were receiving, there's a good chance that they will continue to occur and clog up your optimization feed again.
Destroy All Optimization Data
Sometimes you just want to start over from scratch. This button gives you a clean slate. It deletes the image optimization information from the database, and reverts all completed optimizations. Please note that if you have unfinished requests in progress, the credits associated with those images cannot be recovered. There is no way to undo this process, so please only press Destroy All Optimization Data if you are absolutely sure.
Storage Optimization
After you've optimized your images, there are potentially three copies of each image stored on disk: the newly-optimized version, a WebP version, and a backup of the original unoptimized version. If you are are satisfied with your optimized images, and you have no desire to keep the originals anymore, you can use these buttons to remove them. Just be aware, that without the original backups, there is no way to revert optimization.
Refresh
This button looks like a circular arrow. It will calculate the total amount of disk space used by the original unoptimized images.
Remove Original Image Backups
Press this button to delete all of the backups of the original images. Don't forget, this is irreversible. You will be unable to Revert Optimization once the backups are deleted, so please be certain!
How Image Optimization Works
You may wonder what is actually going on behind-the-scenes when images are optimized. There are two levels to this: the process that is followed when you submit a request, and the actual optimization steps that are being taken on your images.
The Process
The whole process takes place on a central web server.
- You press the Send Optimization Request button.
- The central server denies or accepts the request after callback verification.
- The central server distributes the task to a child server.
- The child server fetches your images.
- The child server processes your images.
- The child server notifies WordPress that the images are ready.
- A cron job runs and pulls your images back into WordPress.
Optimization Steps
What actually happens when your images are processed?
There are libraries for this sort of thing, so we don't need to reinvent the wheel. We use a combination of several libraries to adjust your images to 85%-90% quality of the original.
During the process, three versions of each image file are generated:
yourimage.bk.jpg: the original version of your image.yourimage.jpg: the optimized version of your image, which is what will be shown on your site from now on.yourimage.jpg.webp: is a version of your image saved in a format that is about 25%-34% smaller than jpg (learn more). To automatically serve WebP images to browsers that support them, just set LiteSpeed Cache > Settings > Media > Image WebP Replacement toON.
How LSCache Optimizes so Effectively
LSCache image optimization uses far more than just these popular libraries: PNGQuant, JPEGOptim and OptiPNG. We take the best of the libraries we use, in order to get the best compression.
Changing Your Mind Image by Image
If you want to revert all of your images back to the originals, use the Revert Optimization buttons above. If you decide you prefer just a single image un-optimized, you may revert it to its pre-optimization version from within the Media Library.
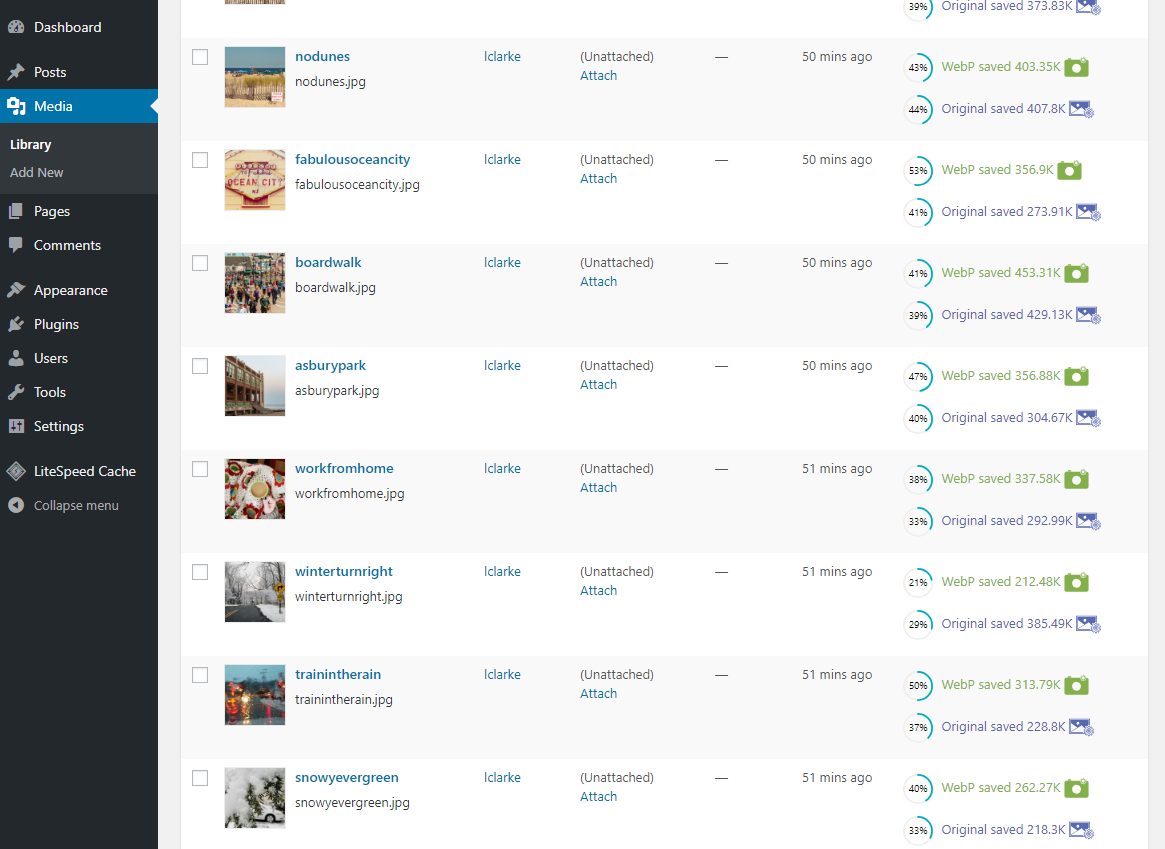
From the WordPress Dashboard, navigate to Media > Library. If you see an image icon in the LiteSpeed Optimization column, it means an optimized version of the image exists. If the icon is purple, then the optimized version is currently in use. If the icon is grayed-out, then the original version is in use. Click the icon to toggle between optimized and unoptimized versions.
You may also toggle the use of the WebP version using the green camera icon.
Troubleshooting
There are a number of different warning/error messages you may see after you've sent an image optimization request. Take a look at our guide to optimization errors to learn what you can do about them.
Server List
In case you would like to whitelist them, here is a list of our Image Optimization servers:
https://wp.api.litespeedtech.com/ips
To find the IP addresses of these URLs, a tool such as this one is useful.
Please Note: As of the release of v2.4, all Image Optimization server IPs have changed. If you whitelisted the servers prior to July 2018, please re-whitelist them using the new IPs. We apologize for any inconvenience!